| Active |
|---|
| This application does not need additional settings. So you can make connectionUnique, active service acces point to a network. There are different types of connections (API key, Oauth…). More only by using your login credentials or by following the instructions below . |
The Line modulesThe module is an application or tool within the Boost.space system. The entire system is built on this concept of modularity. (module - Contacts) More enable you to monitor, publish or update posts, photos and videos in your Line account.
Prerequisites
-
A Line app installed
-
A developer account in the LINE Developers console
-
Created a dedicated Messaging API channel for your bot
![[Caution]](https://docs.boost.space/wp-content/themes/bsdocs/docs-parser/HTML/css/image/caution.png) |
Caution |
|---|---|
|
The moduleThe module is an application or tool within the Boost.space system. The entire system is built on this concept of modularity. (module - Contacts) More dialog fields that are displayed in bold (in the Boost.spaceCentralization and synchronization platform, where you can organize and manage your data. More IntegratorPart of the Boost.space system, where you can create your connections and automate your processes. More scenarioA specific connection between applications in which data can be transferred. Two types of scenarios: active/inactive. More, not in this documentation article) are mandatory! |
To connect your Line account to Boost.space Integrator follow these steps:
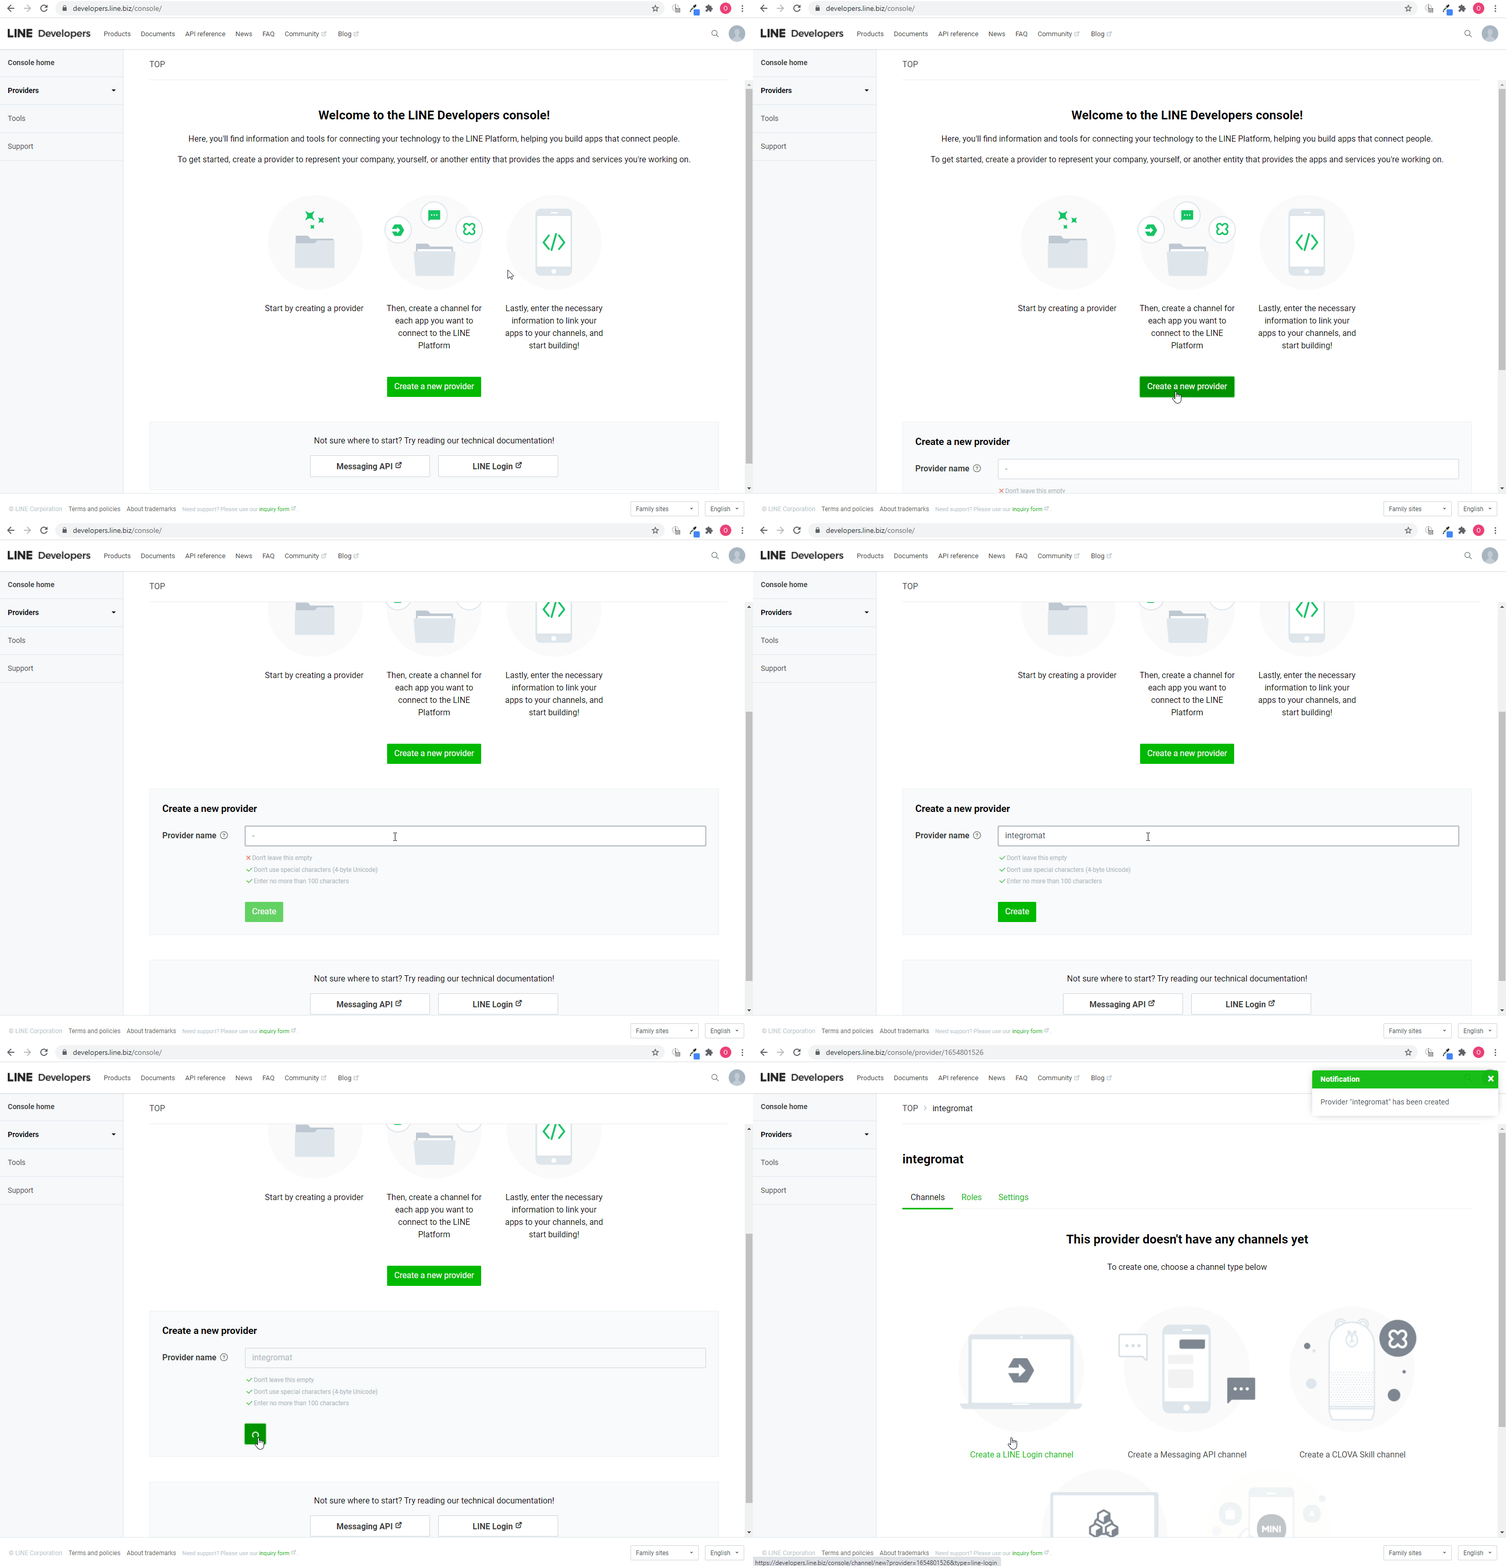
1. Log in to the LINE Developers console.
2. Create a new provider.
3. Click the Create a Messaging API channel.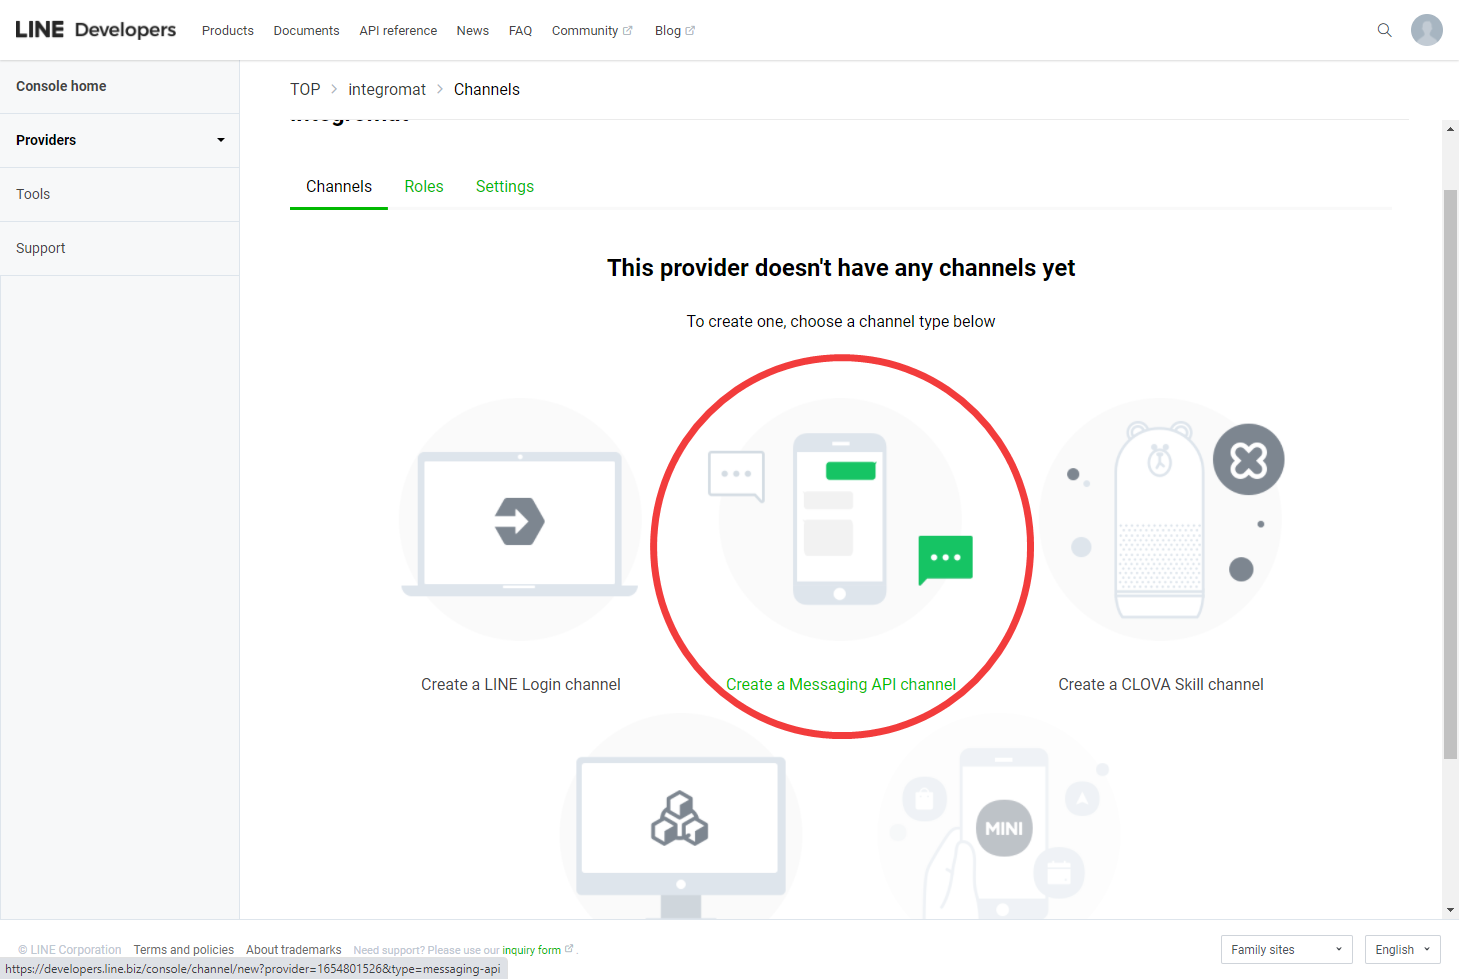
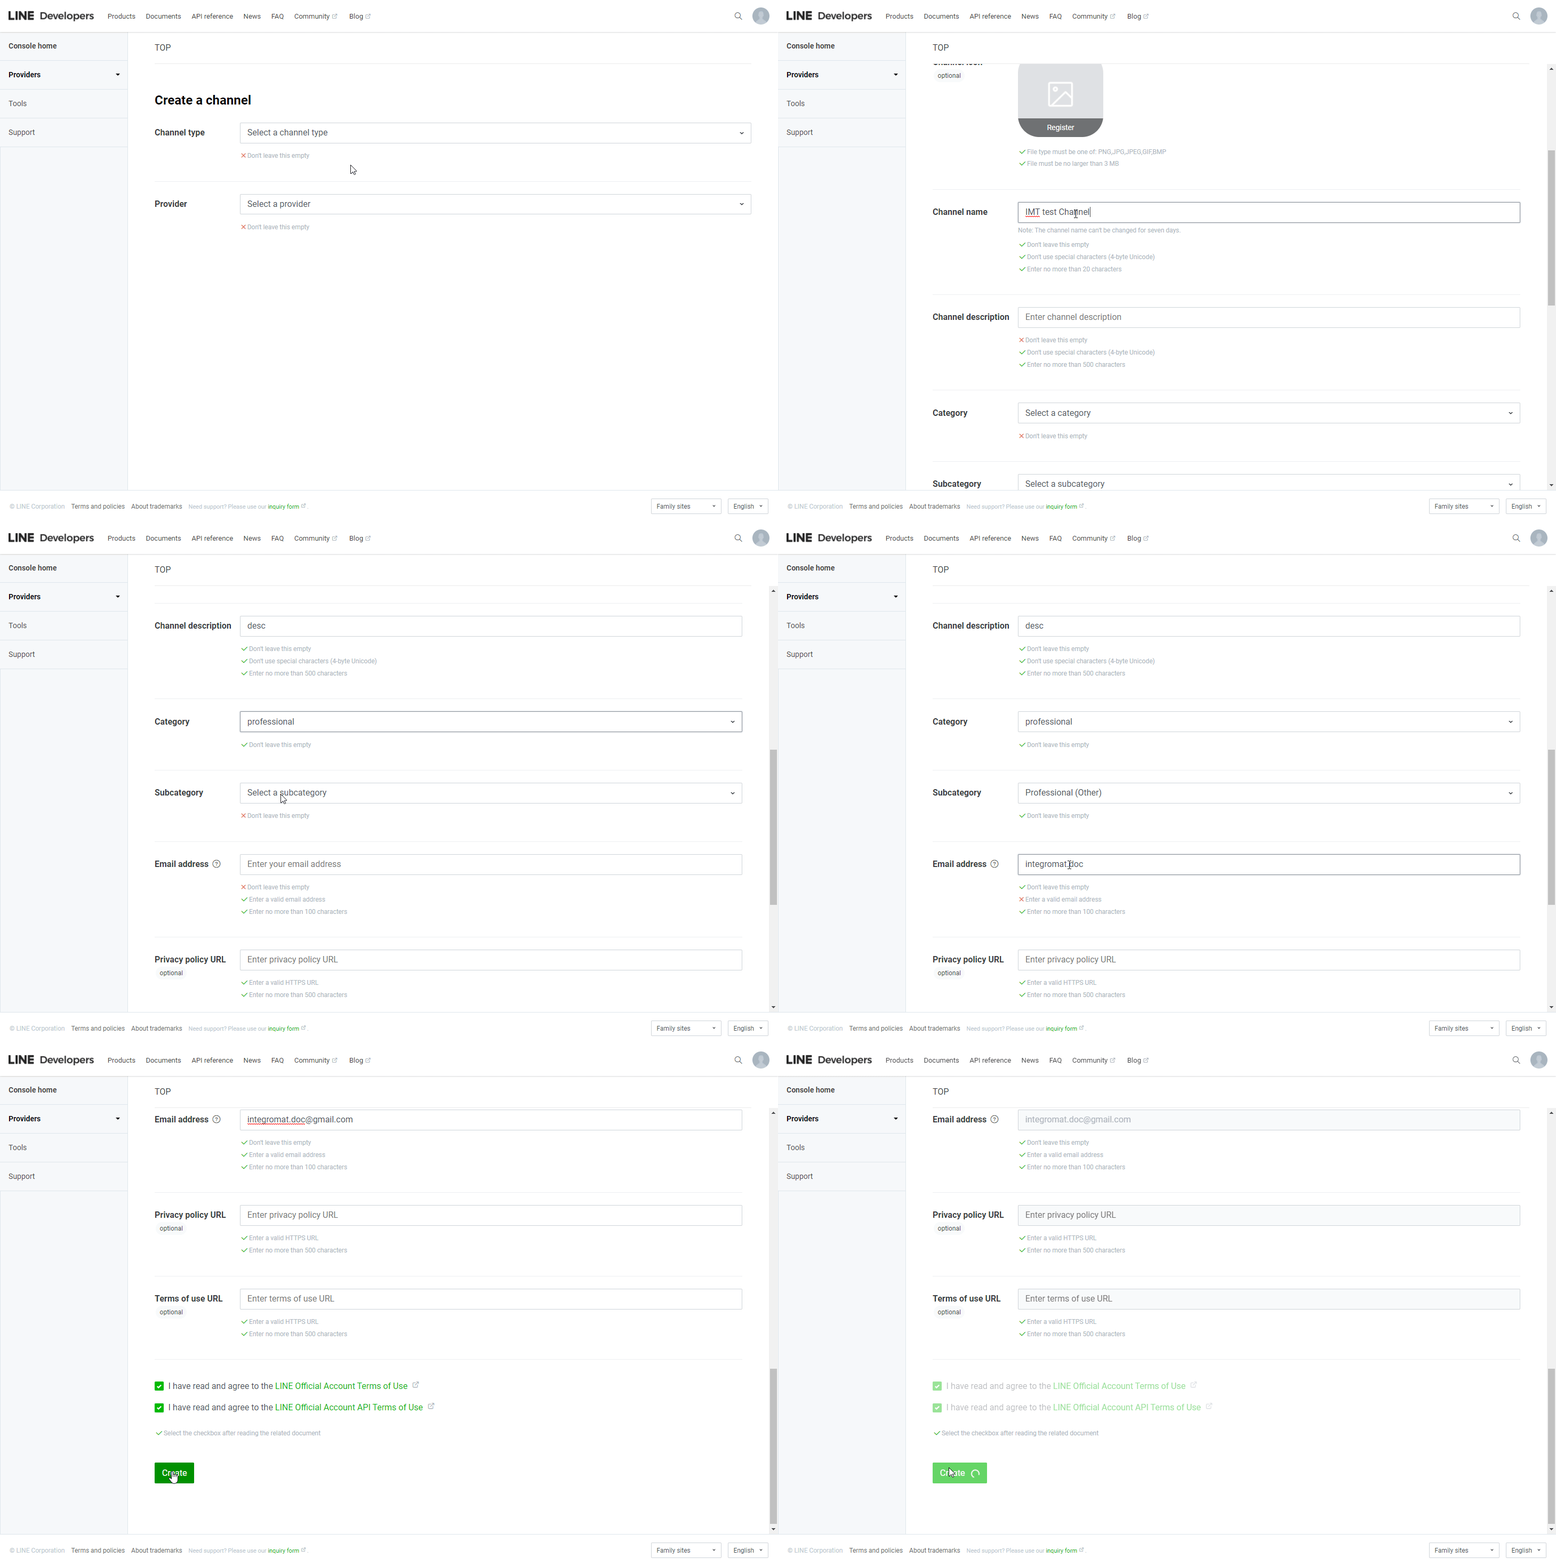
4. Provide the required information and click Create to create a channel.
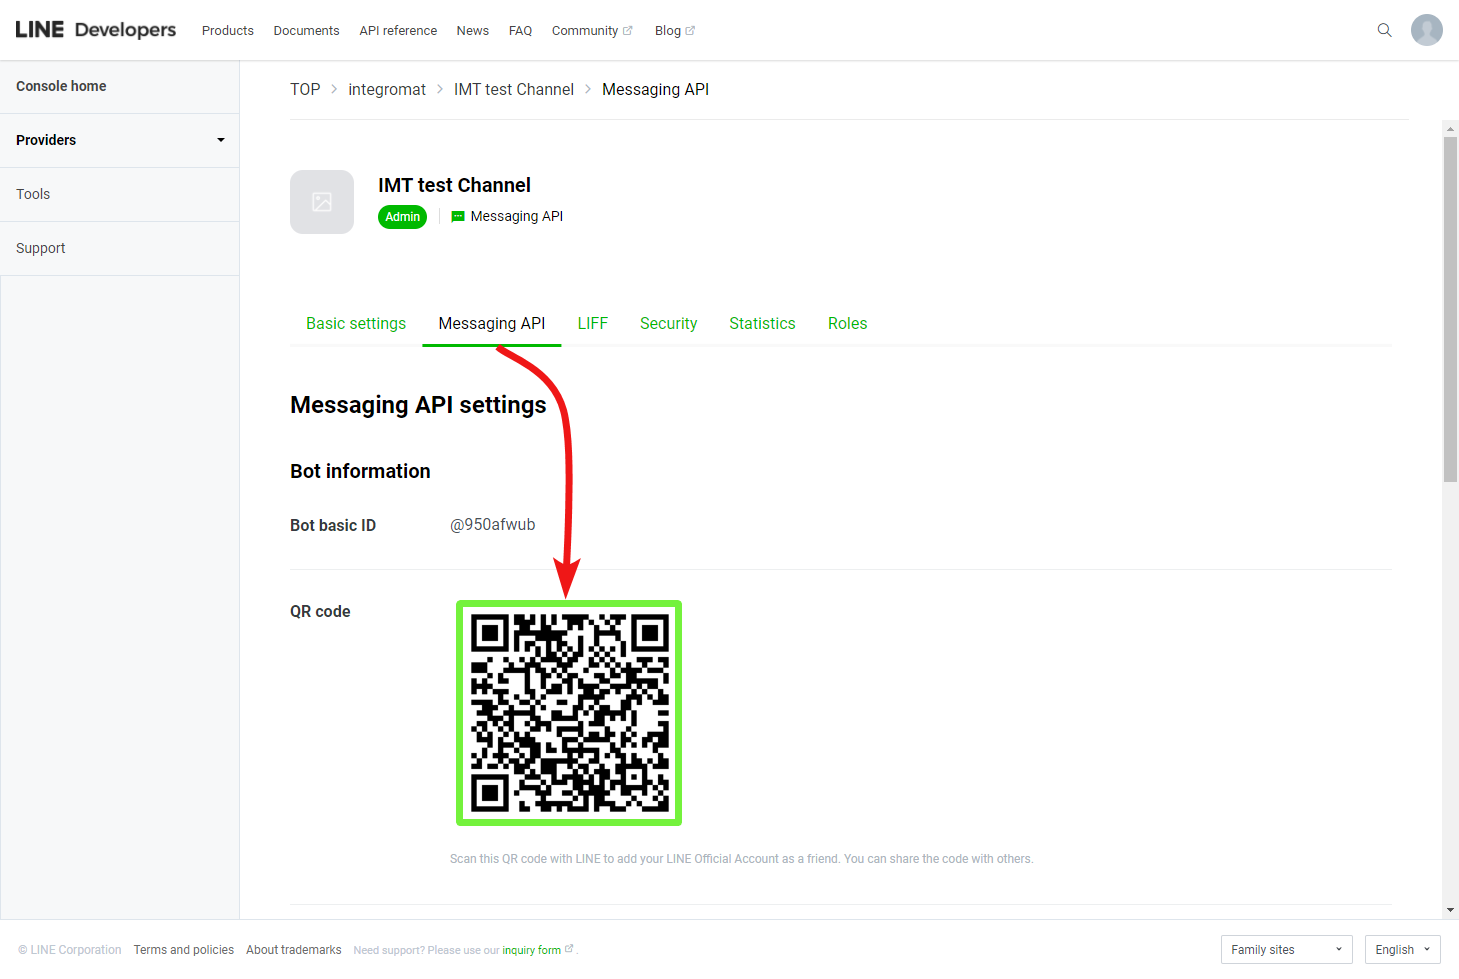
5. In the channel created above, open the Messaging API tab and scan the QR code using your LINE app to add the channel as a friend.
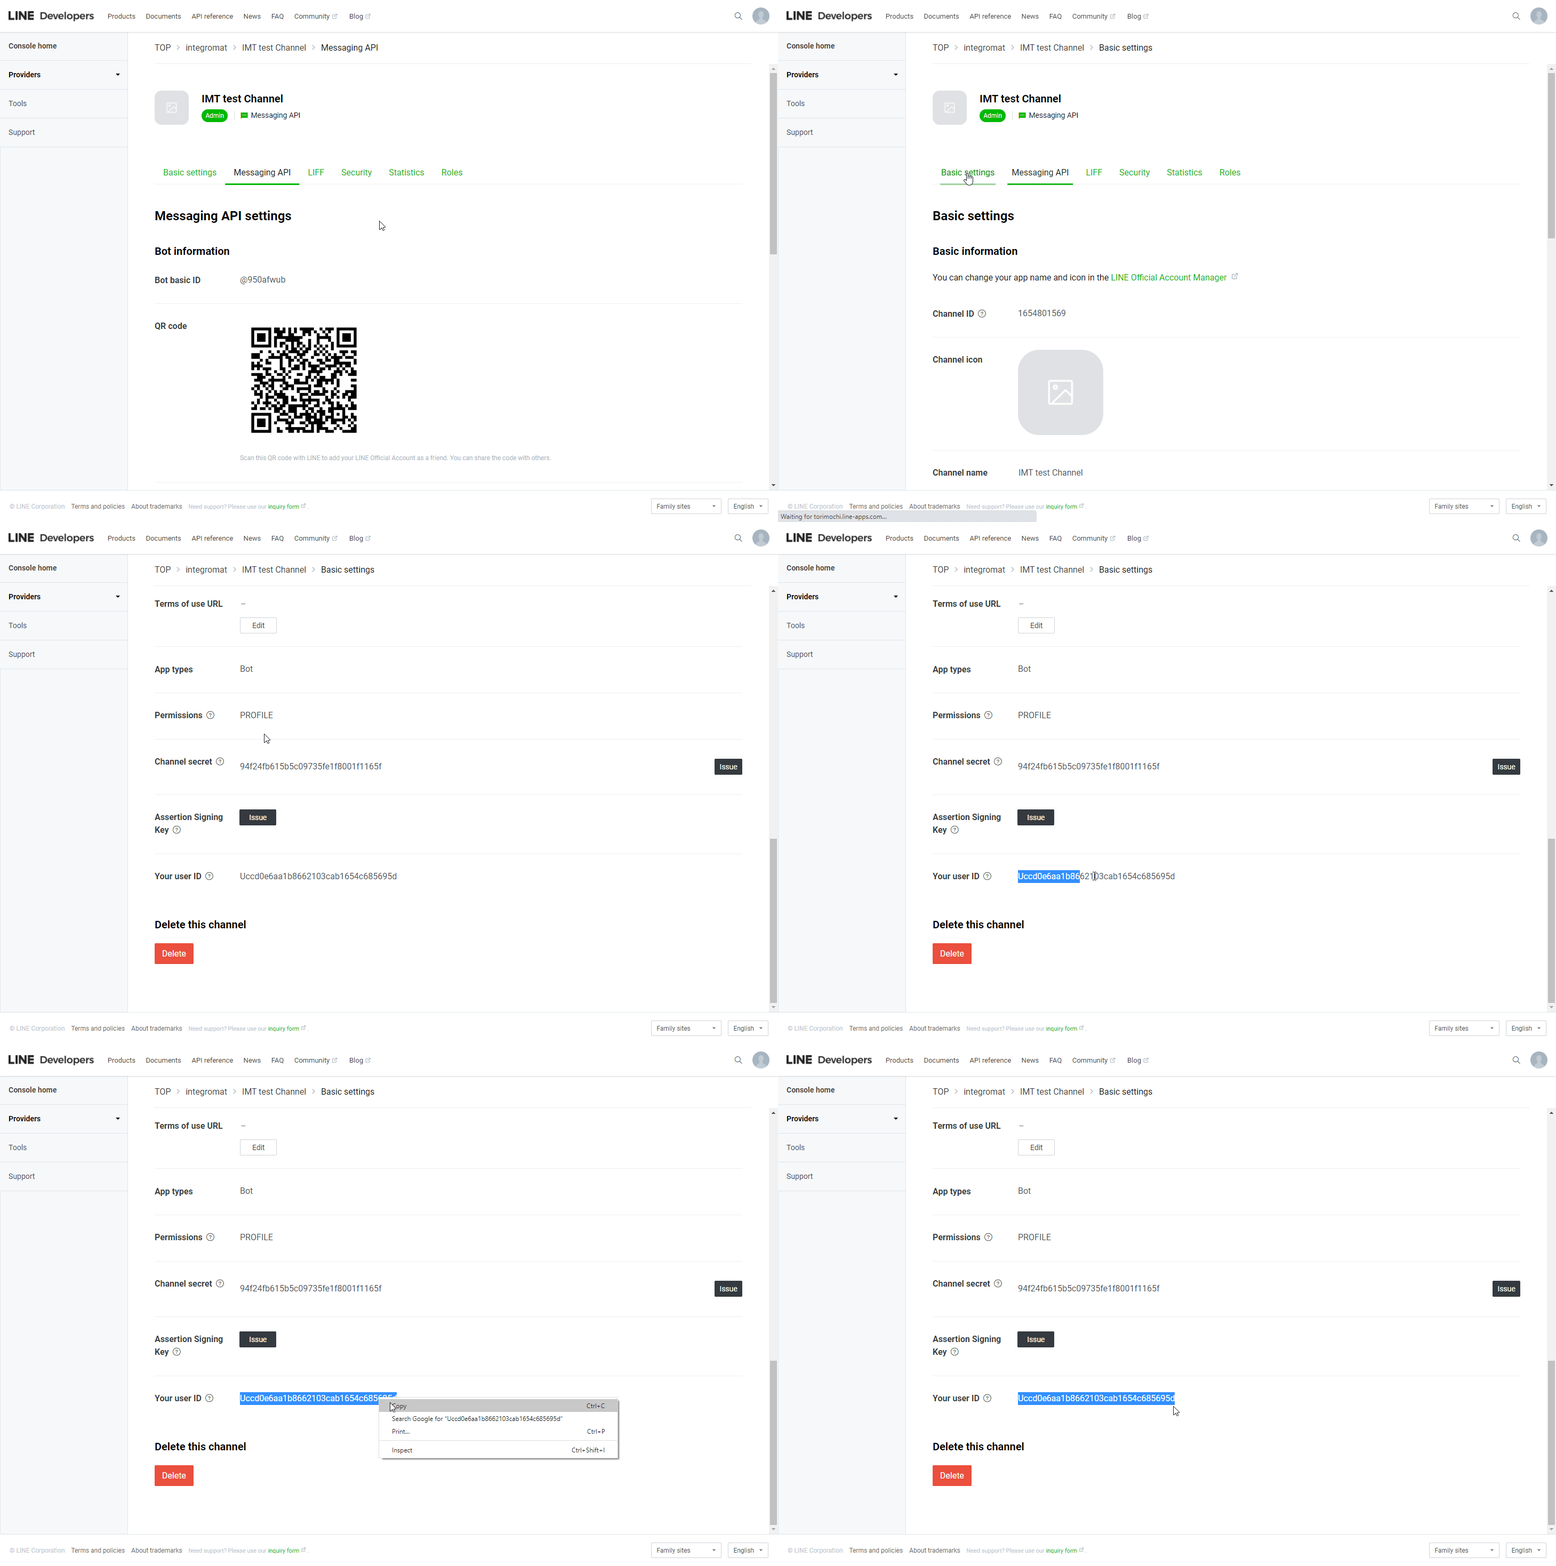
6. In the Messaging API tab, scroll down to the Channel access tokenThe API token is a multi-digit code that allows a user to authenticate with cloud applications. More section and click the Issue button ( ) to generate the Channel Access Token.
7. Navigate to the Basic settings tab, scroll down and copy the provided UserCan use the system on a limited basis based on the rights assigned by the admin. More ID.
8. Go to Boost.space Integrator and open the LINE module’s Create a connection dialog.
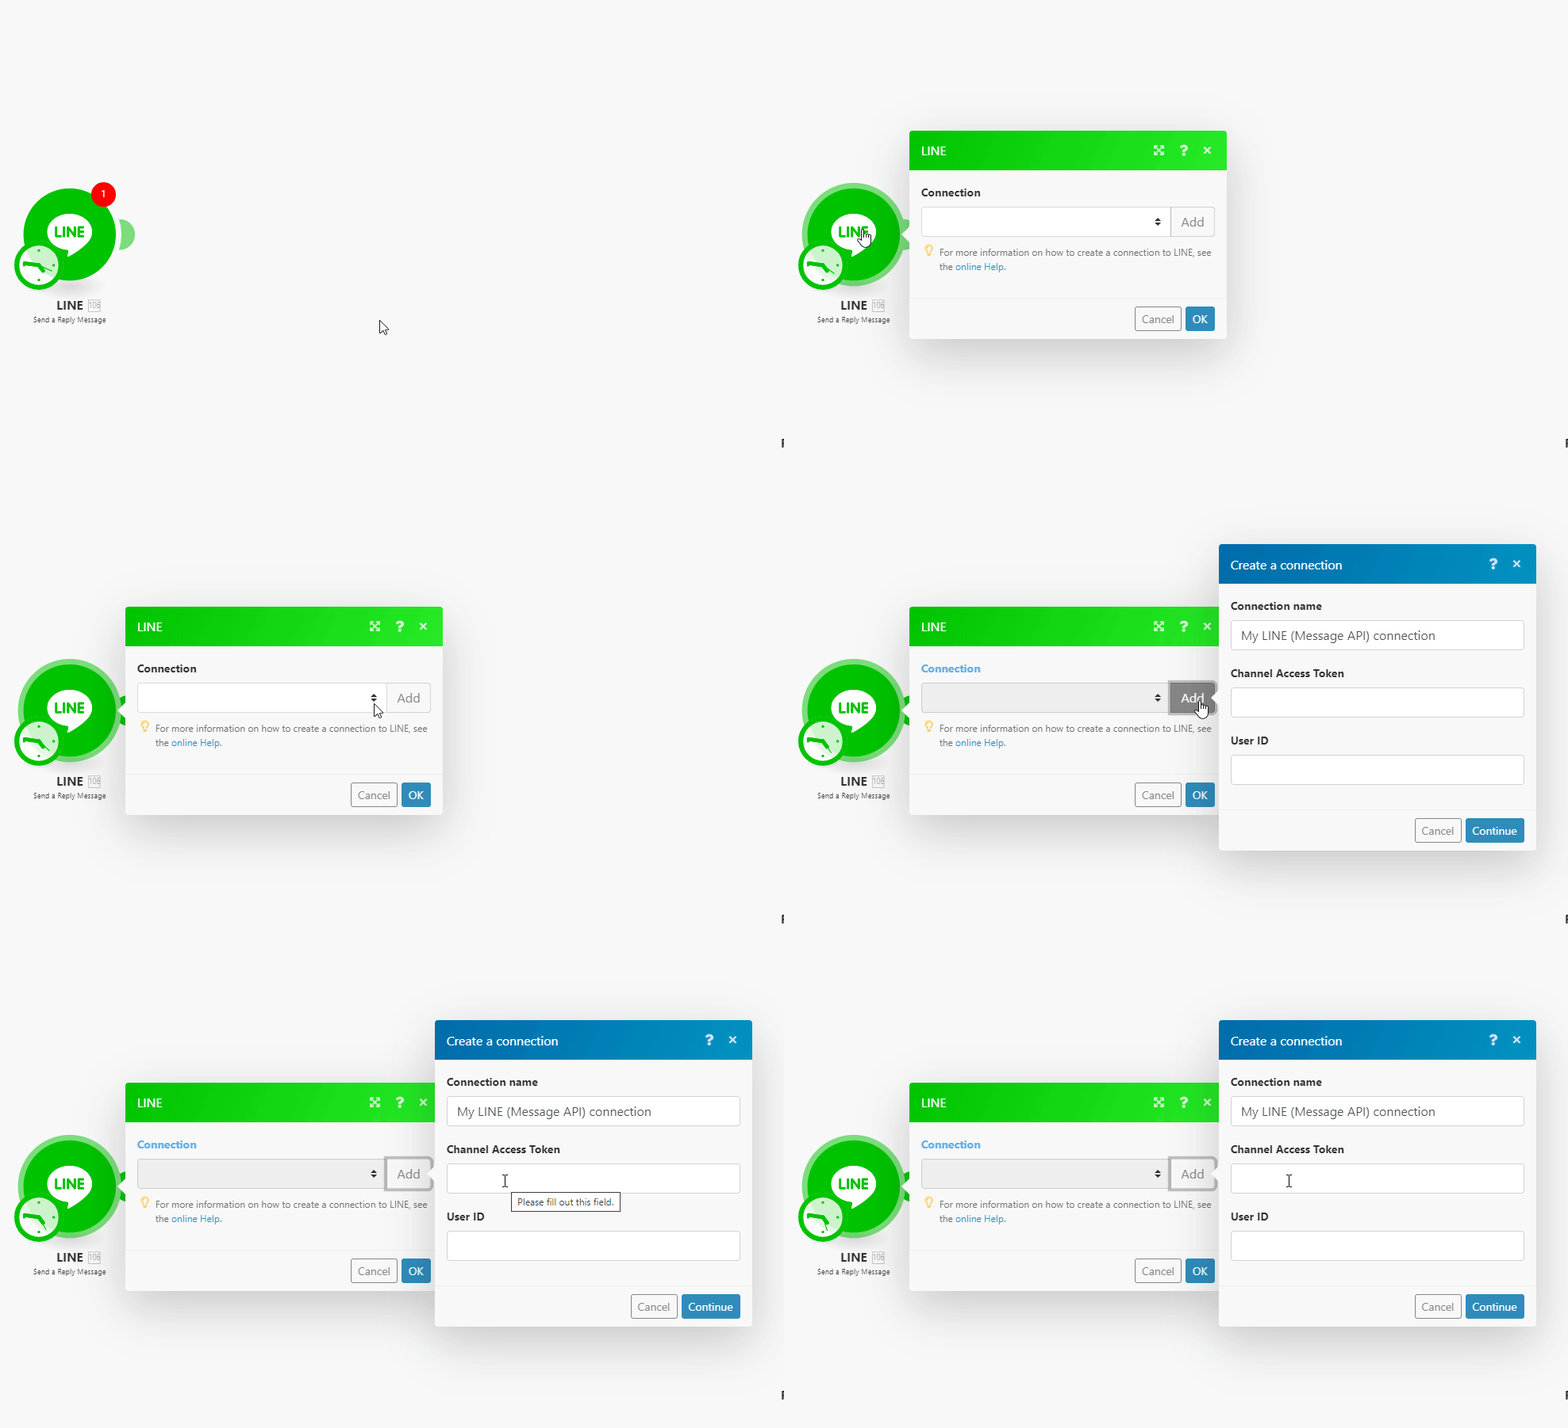
9. Enter the Channel access token you have generated in step 6 and the User ID copied in step 7 to respective fields and click the Continue button to establish the connection.
The connection has been established. You can proceed with setting up the module.
TriggersEvery scenario has a trigger, an event that starts your scenario. A scenario must have a trigger. There can only be one trigger for each scenario. When you create a new scenario, the first module you choose is your trigger for that scenario. Create a trigger by clicking on the empty module of a newly created scenario or moving the... when an event occurs.
The webhookA webhook is a way for an app to send real-time information to a specific URL in response to certain events or triggers. URL needs to be generated in Boost.space Integrator and then added to LINE’s developer settings.
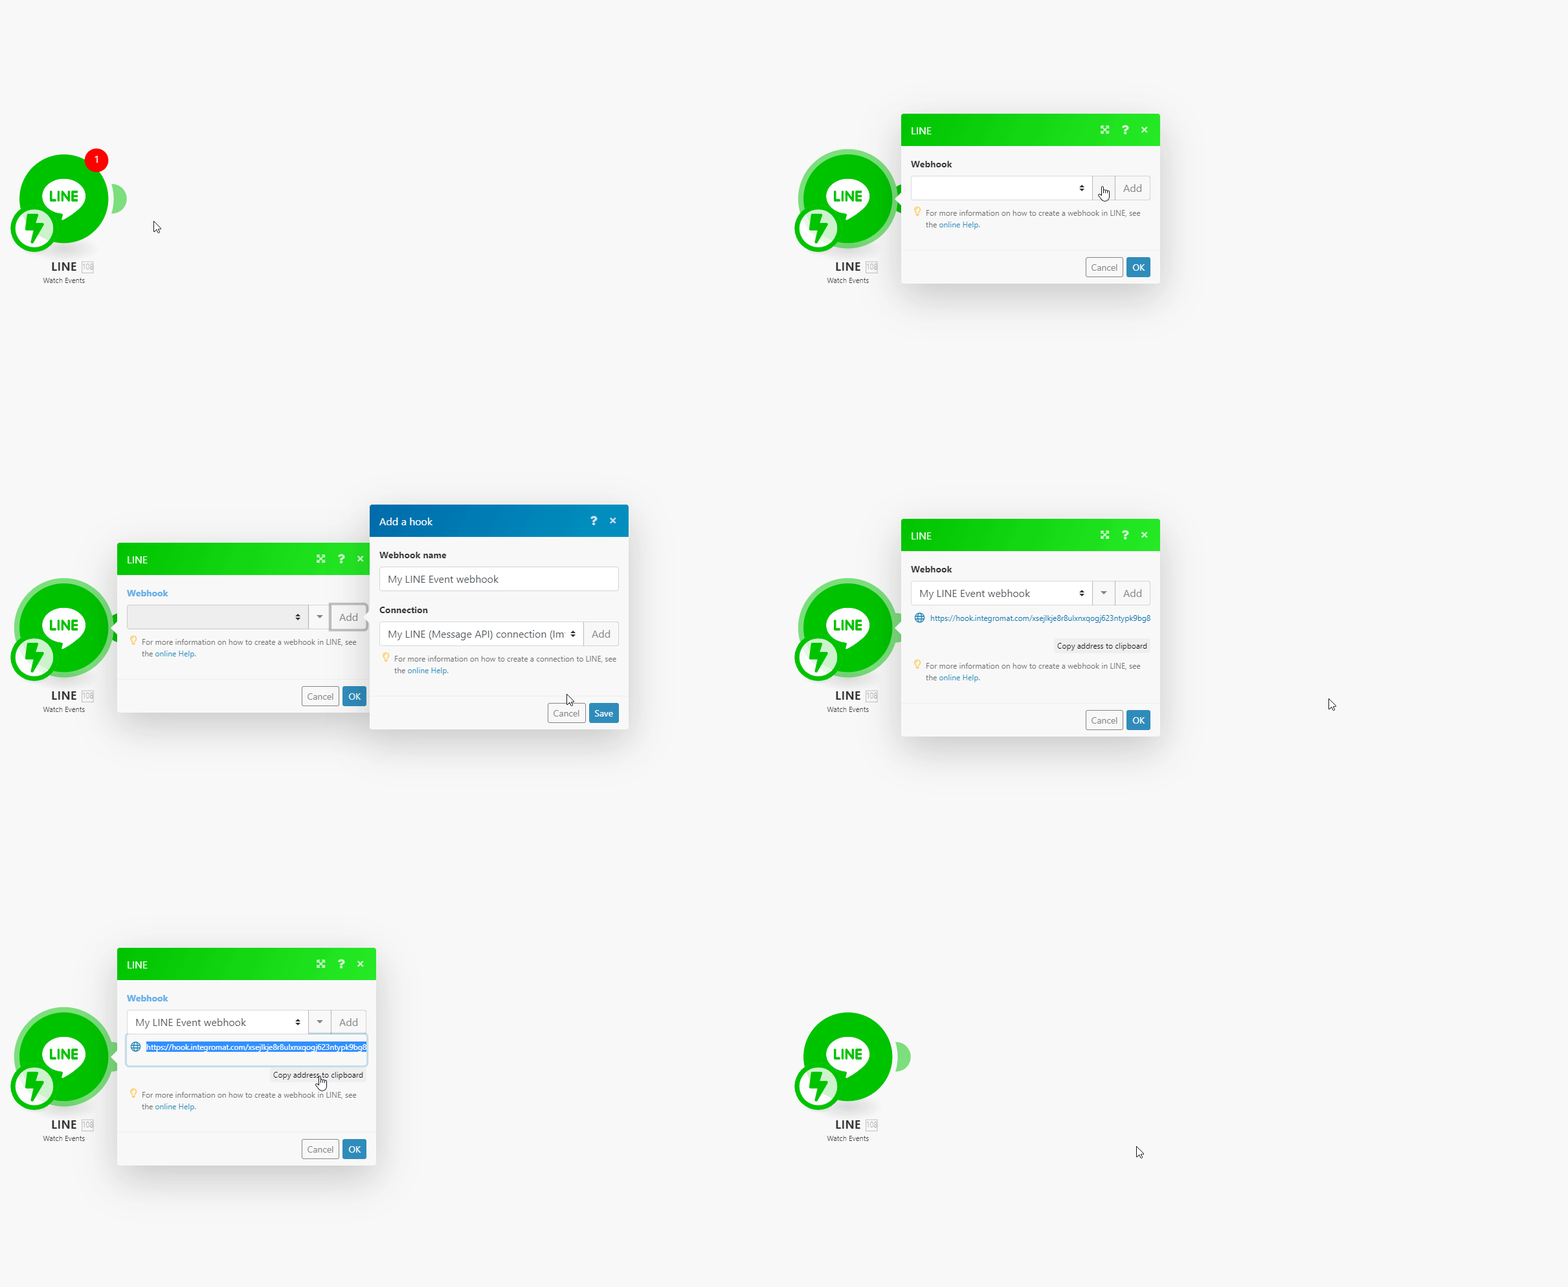
1. Add the Watch New Activity module to your Boost.space Integrator scenario.
2. Generate and copy the webhook URL.
3. Log in to your LINE Developers account.
4. Navigate to Providers > {your provider} > {your messaging API channel} > Messaging API tab.
5. Enter the webhook URL copied in step 2 above to the Webhook URL field and click Update.
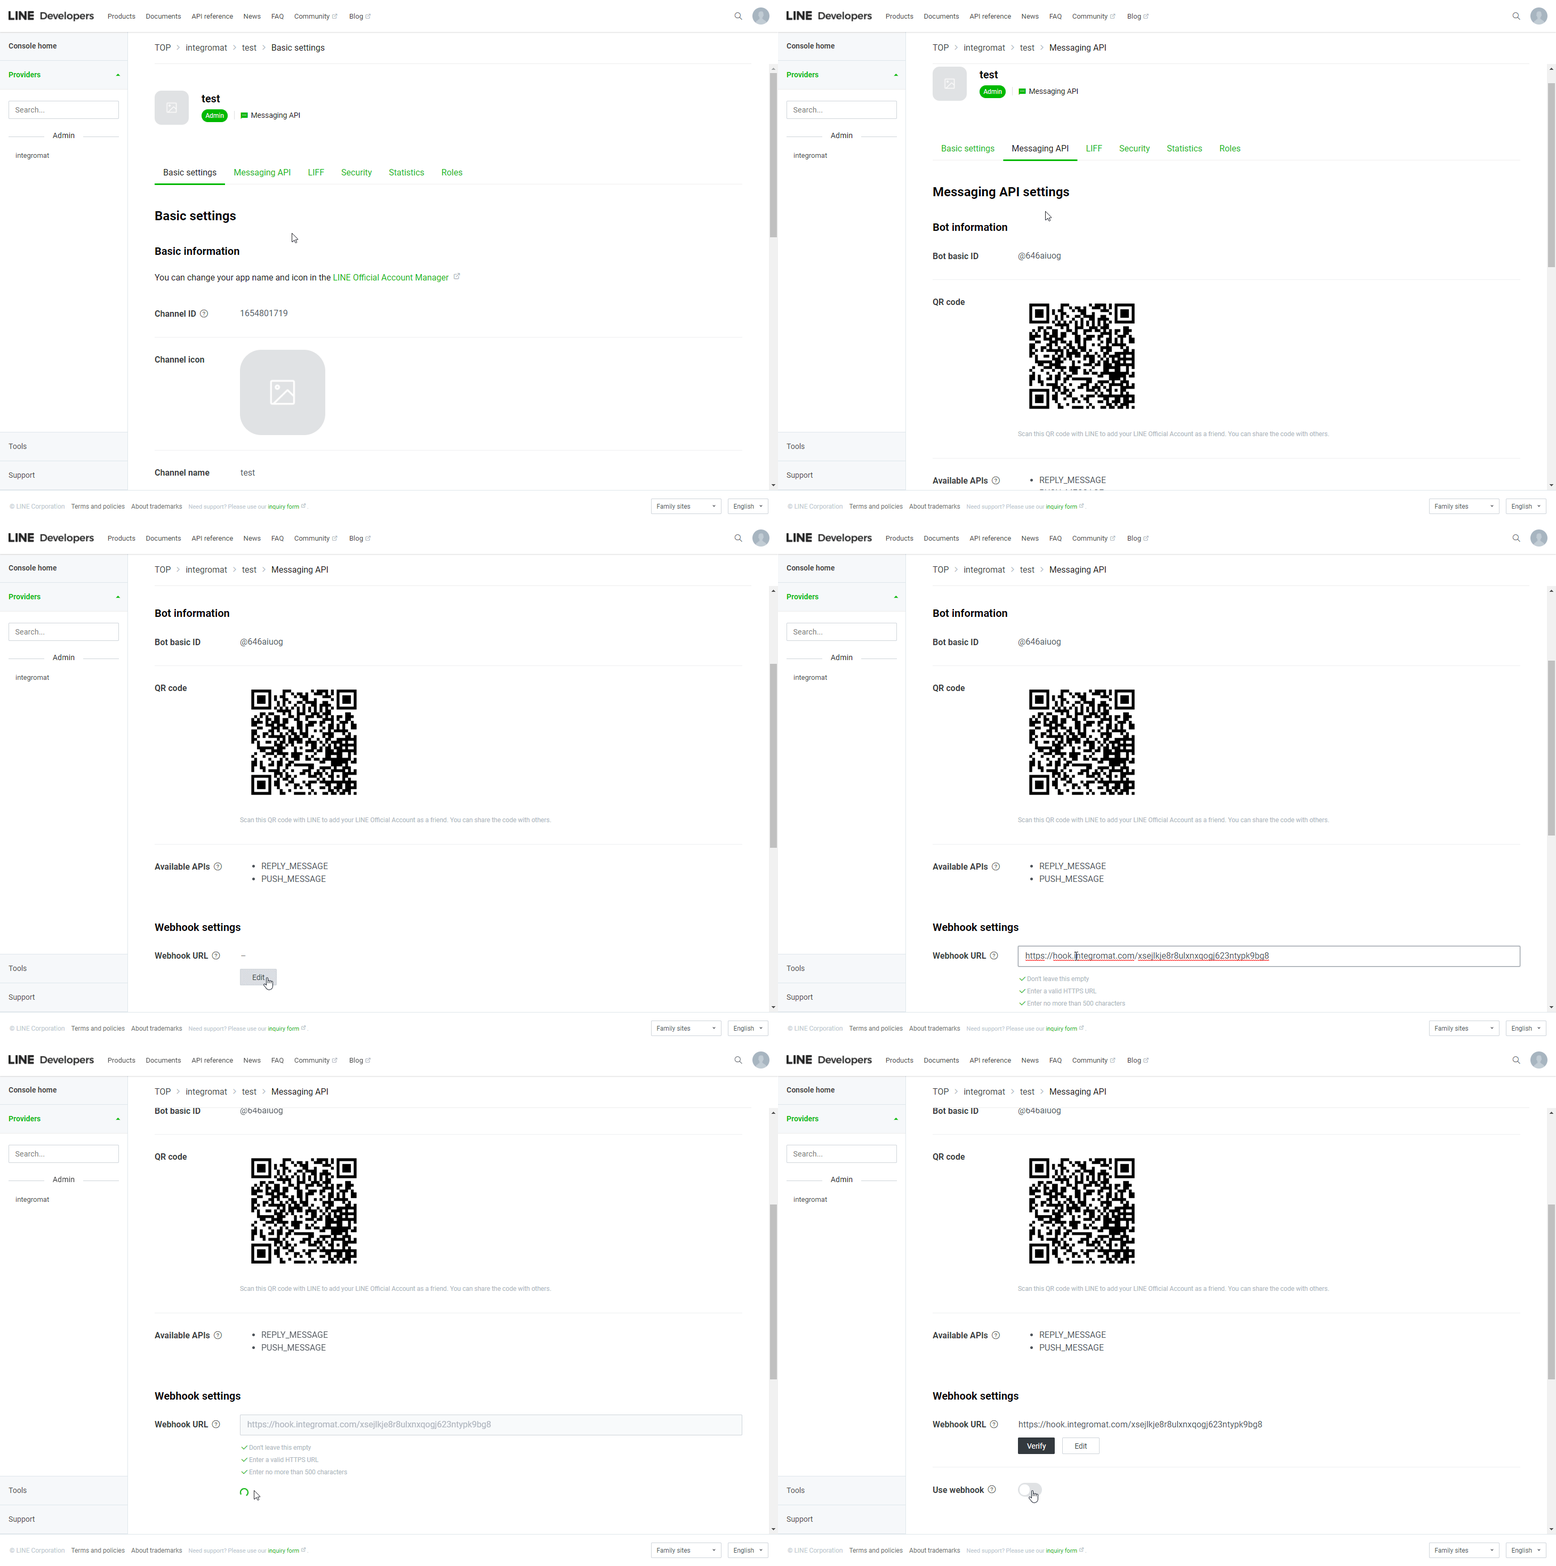
6. Activate the Use webhook option.
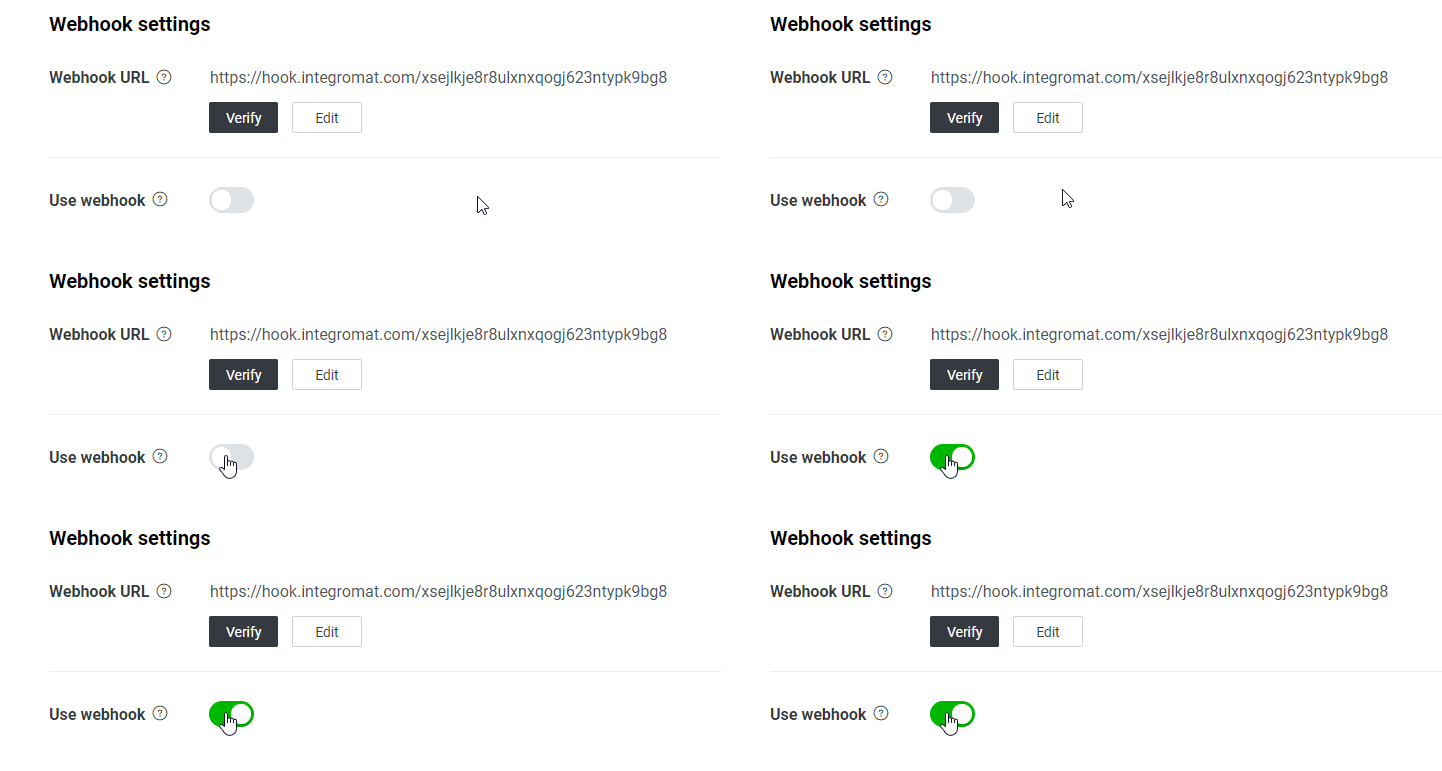
Now, every time an event occurs, the Watch Events module in your Boost.space Integrator scenario is triggered.
Sends a reply message in a response to an event from user, group, or room.
|
Connection |
|||||||||||||||||||||||||||||||||||||||
|
Reply Token |
Map the reply token from the Watch Events module. 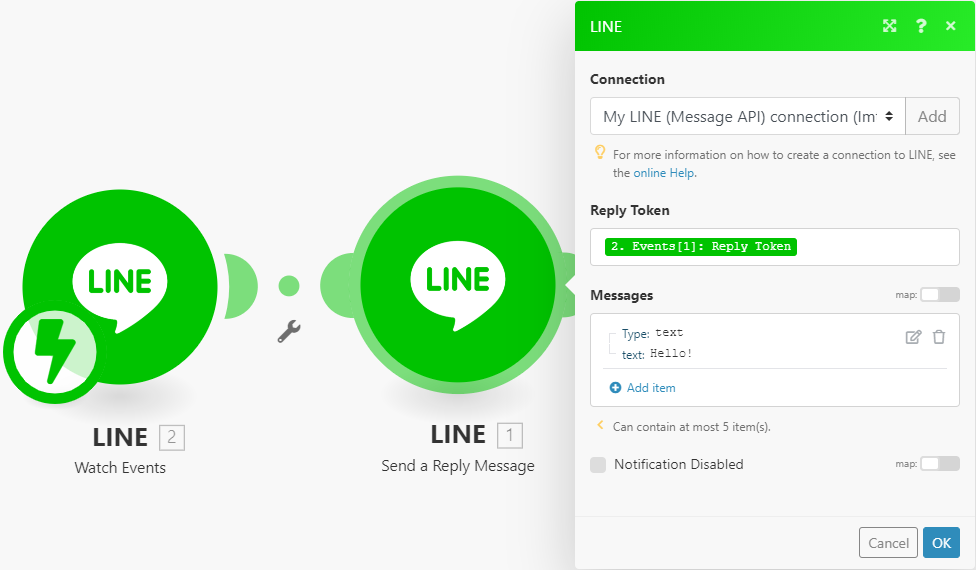 Because the reply token becomes invalid after a certain period of time, responses should be sent as soon as a message is received. Reply tokens can only be used once. |
||||||||||||||||||||||||||||||||||||||
|
Messages |
Set the messages you want to send as reply. Max 5 messages.
|
||||||||||||||||||||||||||||||||||||||
|
Notification Disabled |
Enable this option to disable a push notification to the user when the message is sent. |
Sends a push message to a user, group, or room at any time.
|
Connection |
|||||||||||||||||||||||||||||||||||||||
|
To |
Map the ID of the target recipient. Use a User ID, Group ID, or Room ID returned in the 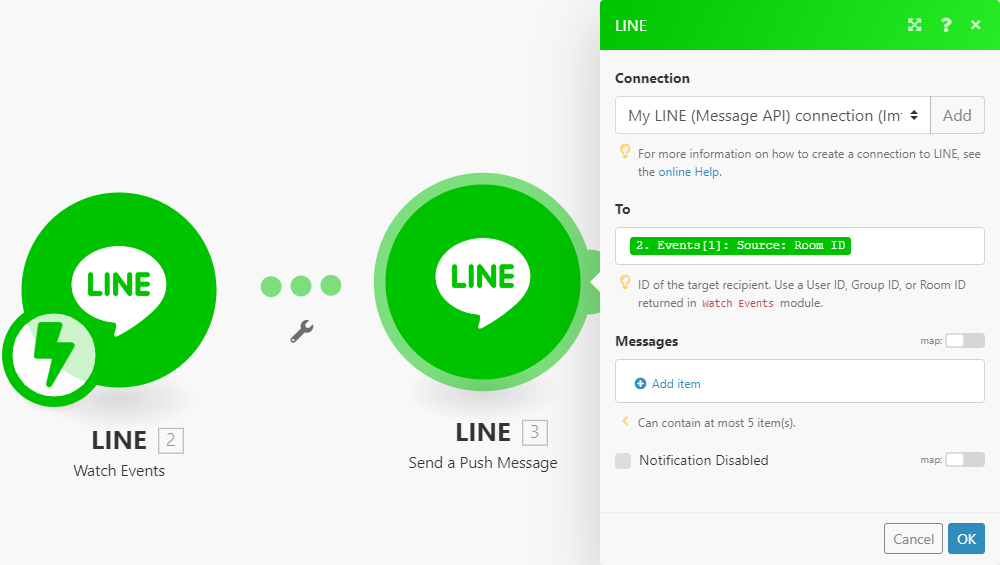 |
||||||||||||||||||||||||||||||||||||||
|
Messages |
Set the messages you want to send. Max 5 messages.
|
||||||||||||||||||||||||||||||||||||||
|
Notification Disabled |
Enable this option to disable a push notification to the user when the message is sent. |
Sends push messages to multiple usersCan use the system on a limited basis based on the rights assigned by the admin. More at any time.
|
Connection |
|||||||||||||||||||||||||||||||||||||||
|
Messages |
Set the messages you want to send as reply. Max 5 messages.
|
||||||||||||||||||||||||||||||||||||||
|
Notification Disabled |
Enable this option to disable a push notification to the user when the message is sent. |
Downloads images, videos, audio, and files sent by users.
|
Connection |
|
|
Message ID |
Enter (map) the ID of the message you want to download an attachment from. The message must contain image, video, audio, and file. Text, sticker or emoji cannot be downloaded. |
Sends a notification to LINE.
![[Caution]](https://docs.boost.space/wp-content/themes/bsdocs/docs-parser/HTML/css/image/caution.png) |
Caution |
|---|---|
|
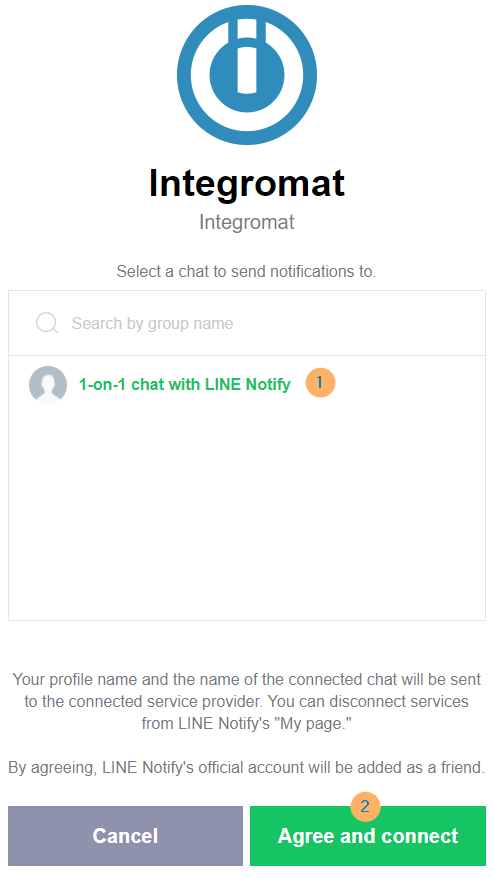
You need to establish a new connection. When establishing a new connection you will be redirected to the LINE website. After you log in, you need to select a chat you want to send notification to and click the Agree and connect button. |
|
Connection |
Establish a connection to the Notify API. |
|
Message |
Enter the message content. Max 1000 characters. |
|
Upload an Image |
Select whether you want to provide an image by file data or URL. |
|
Image Full Size URL |
Enter the URL to the full size image in the JPEG format. Maximum size of 2048×2048 px. |
|
Image Thumbnail URL |
Enter the URL to the image Thumbnail in the JPEG format. Maximum size of 240×240 px. |
|
Source file |
Map the file you want to upload from the previous module (e.g. HTTP > Get a File or Google Drive > Download a File) in the JPG or PNG format, or enter the file name and file data manually. |
|
Add Sticker |
Enable this option to add the sticker to the notification. |
|
Sticker Package ID |
Enter the Sticker Package ID. You can find it in the STKPKGID column in the following PDF document https://devdocs.line.me/files/sticker_list.pdf. |
|
Sticker ID |
Enter the Sticker Package ID. You can find it in the STKID column in the following PDF document https://devdocs.line.me/files/sticker_list.pdf. |
|
Disable a Push Notification |
Enable this option to disable a push notification to the user when the message is sent. |
Retrieves the user IDs of the membersCan view and manage items while using existing statuses and labels. More of a group that the bot is in. To invite a bot, make sure that the Allow bot to join group chats option is enabled in your bot channel settings.
This includes user IDs of users who have not added the LINE Official Account as a friend or have blocked the LINE Official Account.
This feature is available only for verified or premium accounts. For more information about account types, see the Account Types of LINE Official Account page on LINE for Business.
|
Connection |
|
|
Choose |
Select whether you want to retrieve members from the group or room. |
|
Group ID |
Enter (map) the group ID of the group you want to retrieve members from. You can retrieve the group ID using the Watch Events module (triggers when a user joins a group/room). 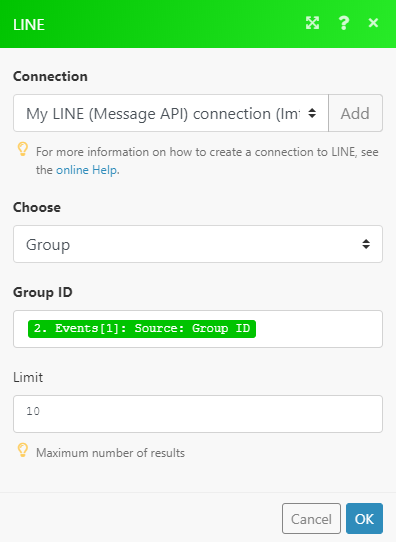 |
|
Room ID |
Enter (map) the room ID of the room you want to retrieve members from. You can retrieve the room ID using the Watch Events module (triggers when a user joins a group/room). |
|
Limit |
Set the maximum number of members Boost.space Integrator will return during one scenario execution. |
Retrieves a display name and profile image URL of the group/room memberCan view and manage items while using existing statuses and labels. More.
|
Connection |
|
|
Choose |
Select whether you want to retrieve member information from the group or room. |
|
Room ID/Group ID |
Enter (map) the group ID or Room ID of the group/room you want to retrieve member information from. You can retrieve the IDs using the Watch Events module (triggers when a user joins a group/room). |
|
User ID |
Enter (map) the user ID of the user you want to retrieve the display name and profile image for. |
Leaves a group or room.
|
Connection |
|
|
Choose |
Select whether you want to leave a group or a room. |
|
Room ID/Group ID |
Enter (map) the group ID or Room ID of the group/room you want to leave. You can retrieve the ID using the Watch Eventsmodule. |
Retrieves a list of all rich menus and their details that have been created by the API.
|
Connection |
|
|
Limit |
Set the maximum number of rich menus Boost.space Integrator will return during one execution cycleA cycle is the operation and commit/rollback phases of scenario execution. A scenario may have one or more cycles (one is the default).. |
Retrieves rich menu details.
|
Connection |
Establish a connection to the Notify API. |
|
Rich Menu ID |
Enter (map) the Rich Menu ID or select the Rich Menu you want to retrieve details about. |
Creates a new rich menu.
You can create up to 1000 rich menus for one LINE Official Account.
|
Connection |
|||||||||||||||||||||||||||||||||||||||||
|
Name |
Enter the name of the rich menu. This value can be used to help manage your rich menus and is not displayed to users. Max character limit: 300 |
||||||||||||||||||||||||||||||||||||||||
|
Chat Bar Text |
Enter the text displayed in the chat bar. Max 14 characters. |
||||||||||||||||||||||||||||||||||||||||
|
Set the Rich Menu by Default |
Enable this option to display the rich menu by default. |
||||||||||||||||||||||||||||||||||||||||
|
Source File |
Map the file you want to upload from the previous module (e.g. HTTP > Get a File or Google Drive > Download a File), or enter the file name and file data manually.
|
||||||||||||||||||||||||||||||||||||||||
|
Select Size of Rich Menu |
Select the size of the rich menu.
|
||||||||||||||||||||||||||||||||||||||||
|
Areas |
Define the coordinates and size of tappable areas. Max 20 areas.
|
Downloads an image associated with a rich menu created by the API.
|
Connection |
|
|
Rich Menu ID |
Select the rich menu you want to download the image from. |
Deletes a Rich Menu.
|
Connection |
|
|
Rich Menu ID |
Enter (map) the ID of the rich menu or select the rich menu you want to delete. |
Returns the number of messages sent from LINE Official Account on a specified day.
|
Connection |
|
|
Date |
Enter the date for which to retrieve number of sent messages.
|
Returns the number of users who have added the LINE Official Account on or before a specified date.
|
Connection |
|
|
Date |
Enter the date for which to retrieve the number of followers.
|
Allows you to perform a custom API call.
|
Connection |
|
|
URL |
Enter a path relative to For example: For the list of available endpoints, refer to the LINE Messaging API Documentation. |
|
Method |
Select the HTTP method you want to use:
|
|
Headers |
Enter the desired request headers. You don’t have to add authorization headers; we already did that for you. |
|
Query String |
Enter the request query string. |
|
Body |
Enter the body content for your API call. |
The following API call returns all rich menus in your LINE account:
URL:
/v2/bot/richmenu/list
Method:
GET
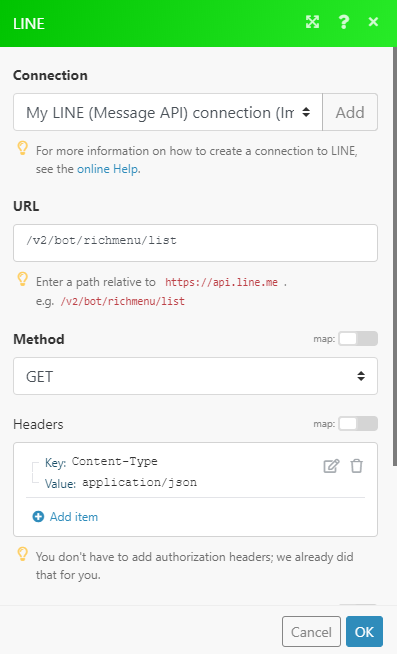 |
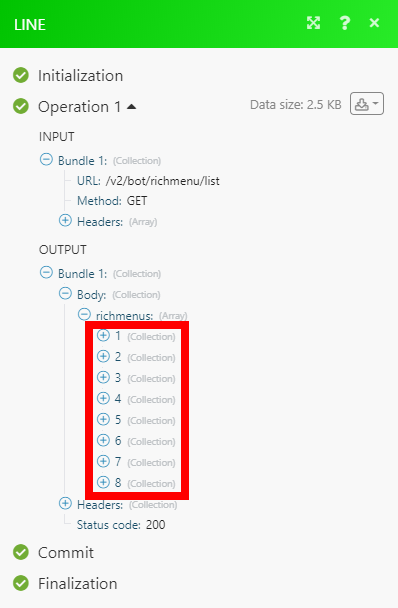
The result can be found in the module’s Output under BundleA bundle is a chunk of data and the basic unit for use with modules. A bundle consists of items, similar to how a bag may contain separate, individual items. More > Body > richmenus.
In our example, 8 rich menus were returned:
 |

