| Active with remarks |
|---|
| This application needs additional settings. Please follow the documentation below to create your own connectionUnique, active service acces point to a network. There are different types of connections (API key, Oauth…). More. |
The Geckoboard modulesThe module is an application or tool within the Boost.space system. The entire system is built on this concept of modularity. (module - Contacts) More allow you to create, add recordsOne row in the Boost.space database. These are individual rows under spaces in each module. For example single products, but not their variants. More in the datasets, and delete the datasets in your Geckoboard account.
Prerequisites
-
A Geckoboard account
In order to use Geckoboard with Boost.spaceCentralization and synchronization platform, where you can organize and manage your data. More IntegratorPart of the Boost.space system, where you can create your connections and automate your processes. More, it is necessary to have a Geckoboard account. If you do not have one, you can create a Geckoboard account at geckoboard.com/try-geckoboard.
![[Note]](https://docs.boost.space/wp-content/themes/bsdocs/docs-parser/HTML/css/image/note.png) |
Note |
|---|---|
|
The moduleThe module is an application or tool within the Boost.space system. The entire system is built on this concept of modularity. (module - Contacts) More dialog fields that are displayed in bold (in the Boost.space Integrator scenarioA specific connection between applications in which data can be transferred. Two types of scenarios: active/inactive. More, not in this documentation article) are mandatory! |
To connect your Geckoboard account to Boost.space Integrator you need to obtain the API Key from your Geckoboard account and insert it in the Create a connection dialog in the Boost.space Integrator module.
-
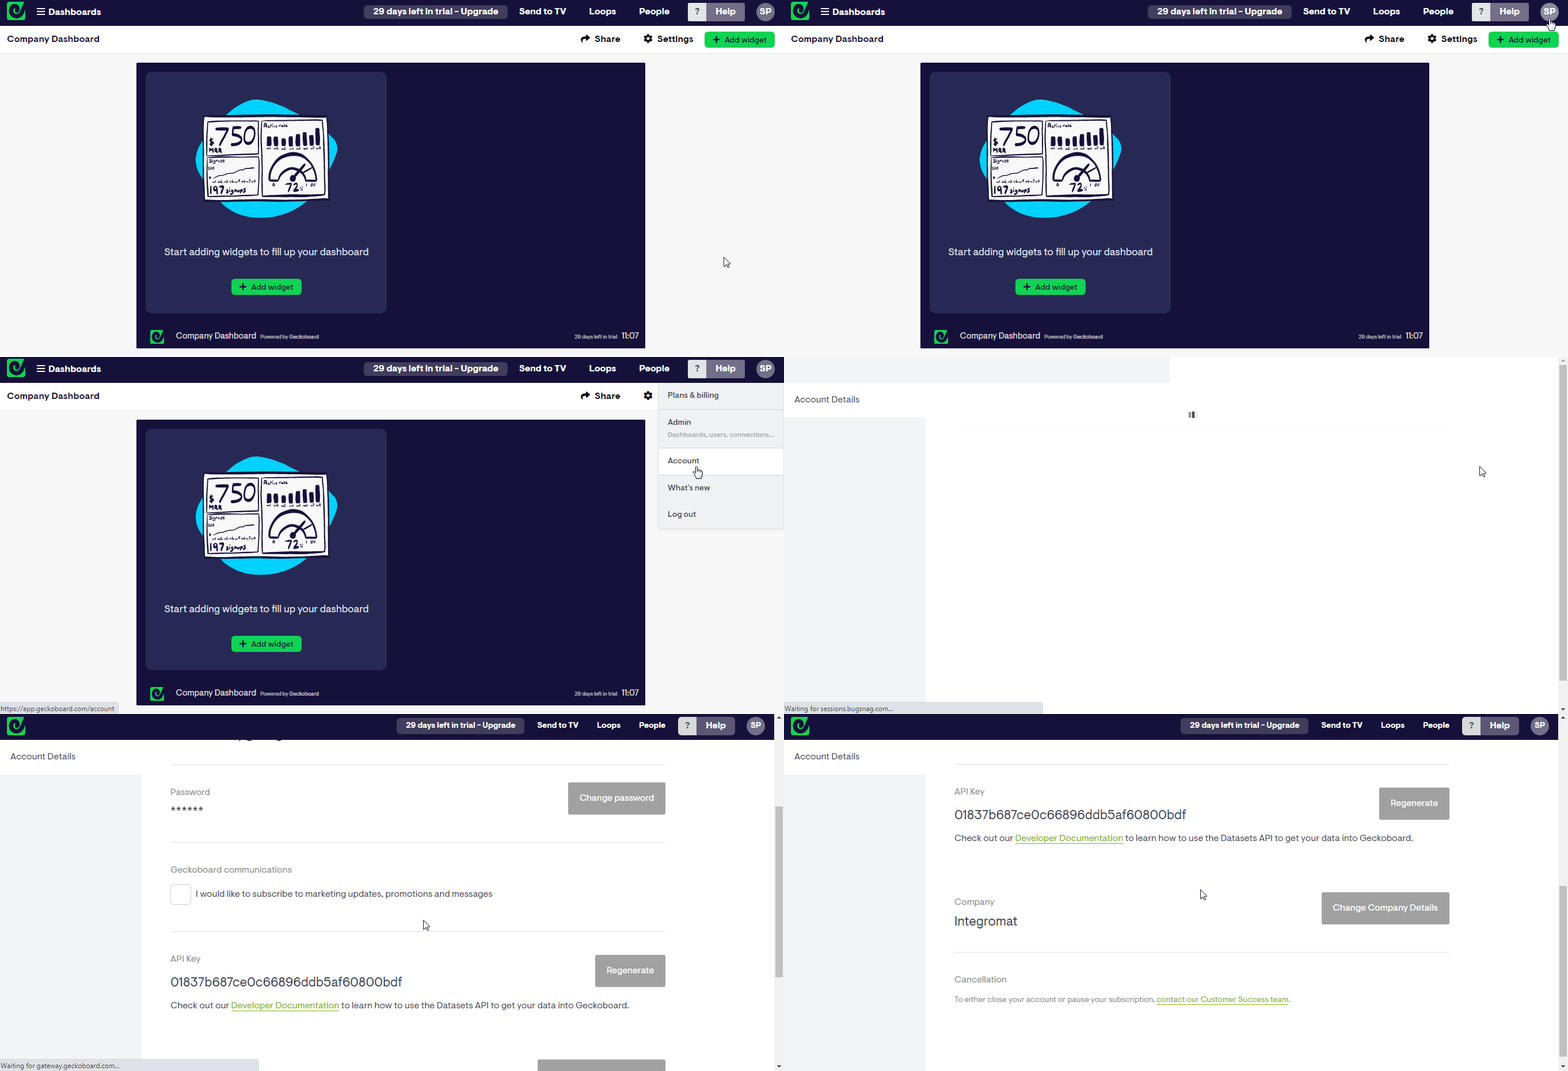
Log in to your Geckoboard account.
-
Click Your Profile Icon > Account.

-
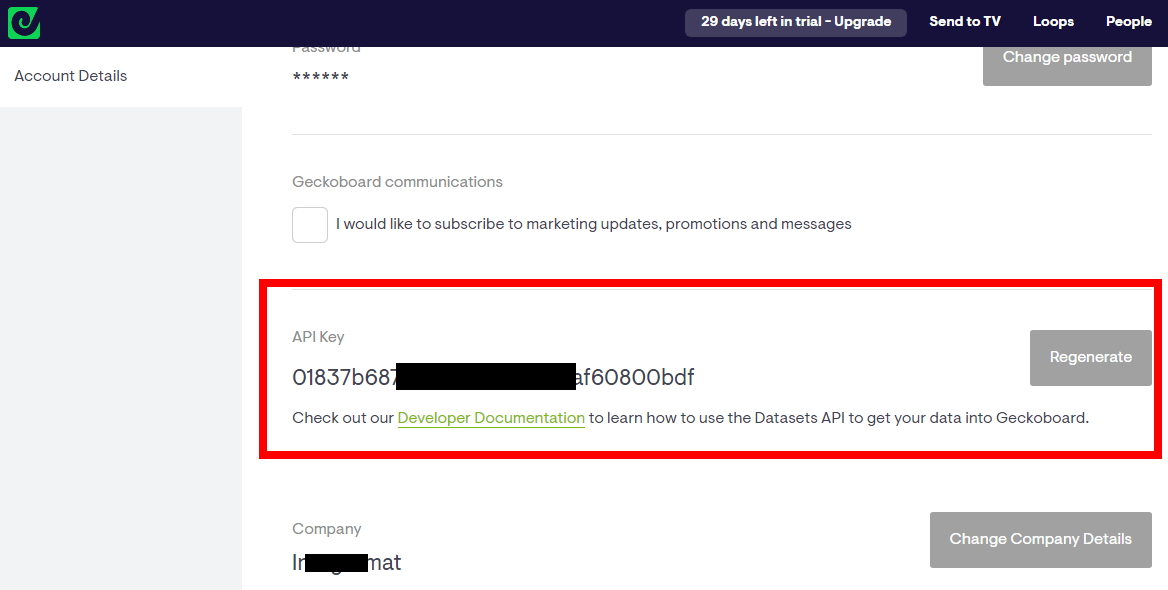
Copy the API Key to your clipboard.

-
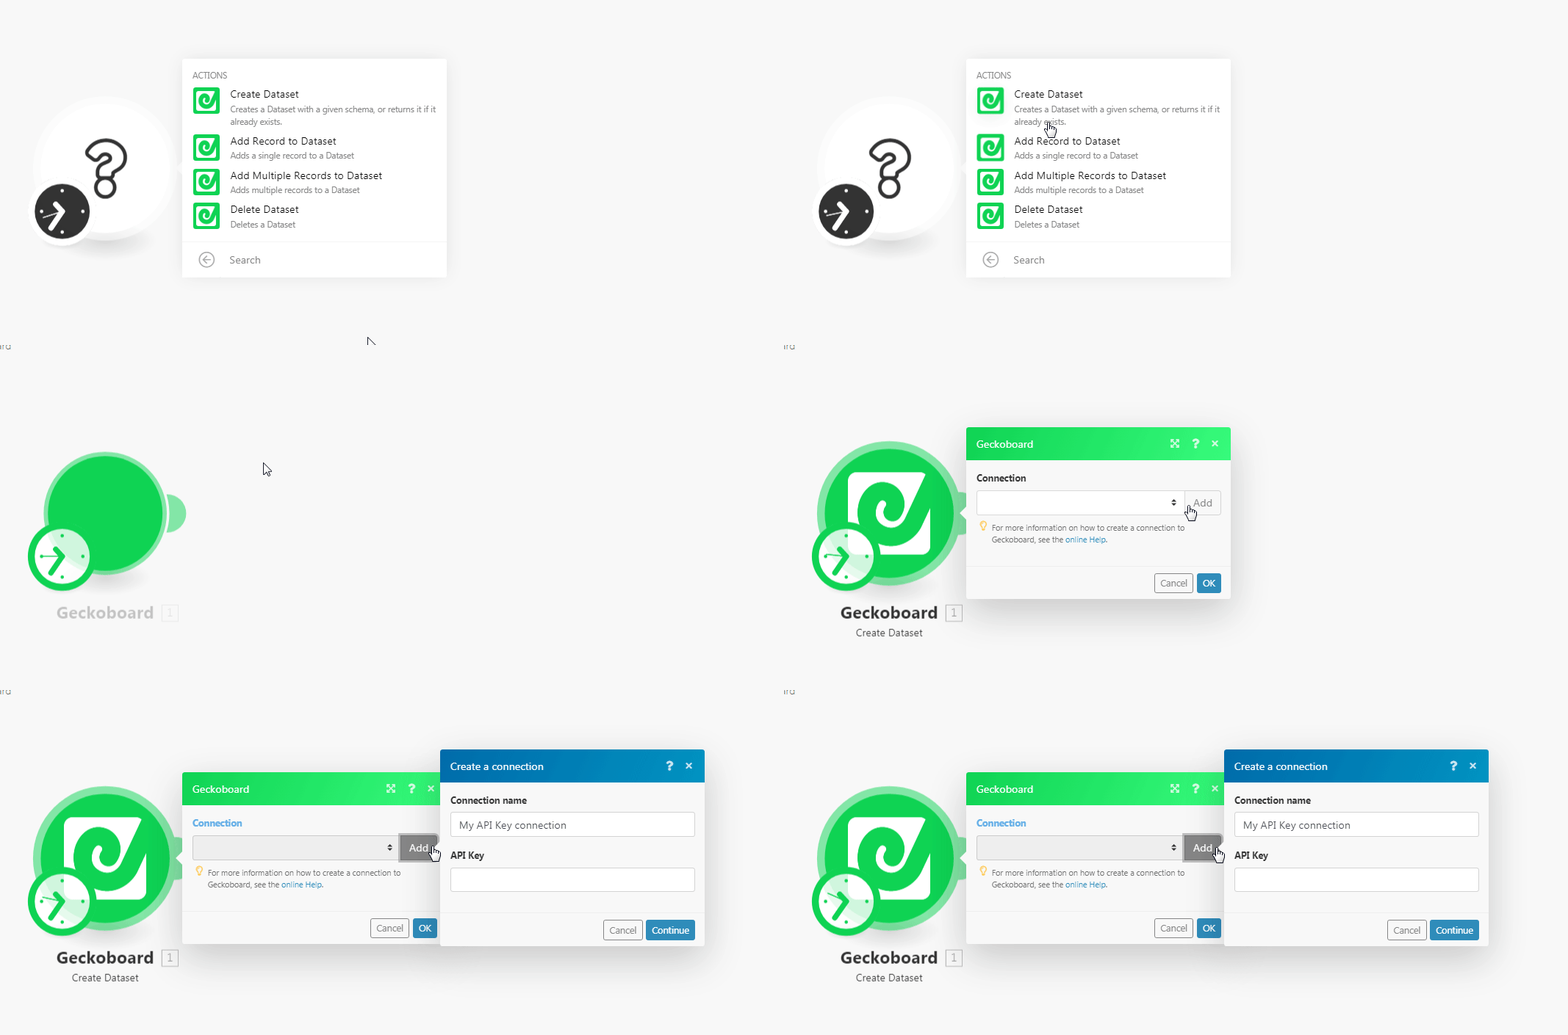
Go to Boost.space Integrator and open the Geckoboard module’s Create a connection dialog.

-
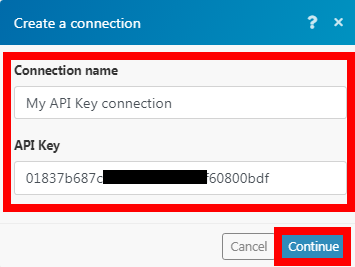
In the Connection name field, enter the name of the connection.
-
In the API Key field, enter the API key copied in step 3 and click Continue.

The connection has been established successfully.
