| Active with remarks |
|---|
| This application needs additional settings. Please follow the documentation below to create your own connectionUnique, active service acces point to a network. There are different types of connections (API key, Oauth…). More. |
With the Automation Anywhere modulesThe module is an application or tool within the Boost.space system. The entire system is built on this concept of modularity. (module - Contacts) More in Boost.spaceCentralization and synchronization platform, where you can organize and manage your data. More IntegratorPart of the Boost.space system, where you can create your connections and automate your processes. More you can:
-
triggerEvery scenario has a trigger, an event that starts your scenario. A scenario must have a trigger. There can only be one trigger for each scenario. When you create a new scenario, the first module you choose is your trigger for that scenario. Create a trigger by clicking on the empty module of a newly created scenario or moving the... a bot
-
call APIs
To get started with Automation Anywhere, create an account here.
![[Note]](https://docs.boost.space/wp-content/themes/bsdocs/docs-parser/HTML/css/image/note.png) |
Note |
|---|---|
|
To connect to the Automation Anywhere (Cloud) app, you must have: |
-
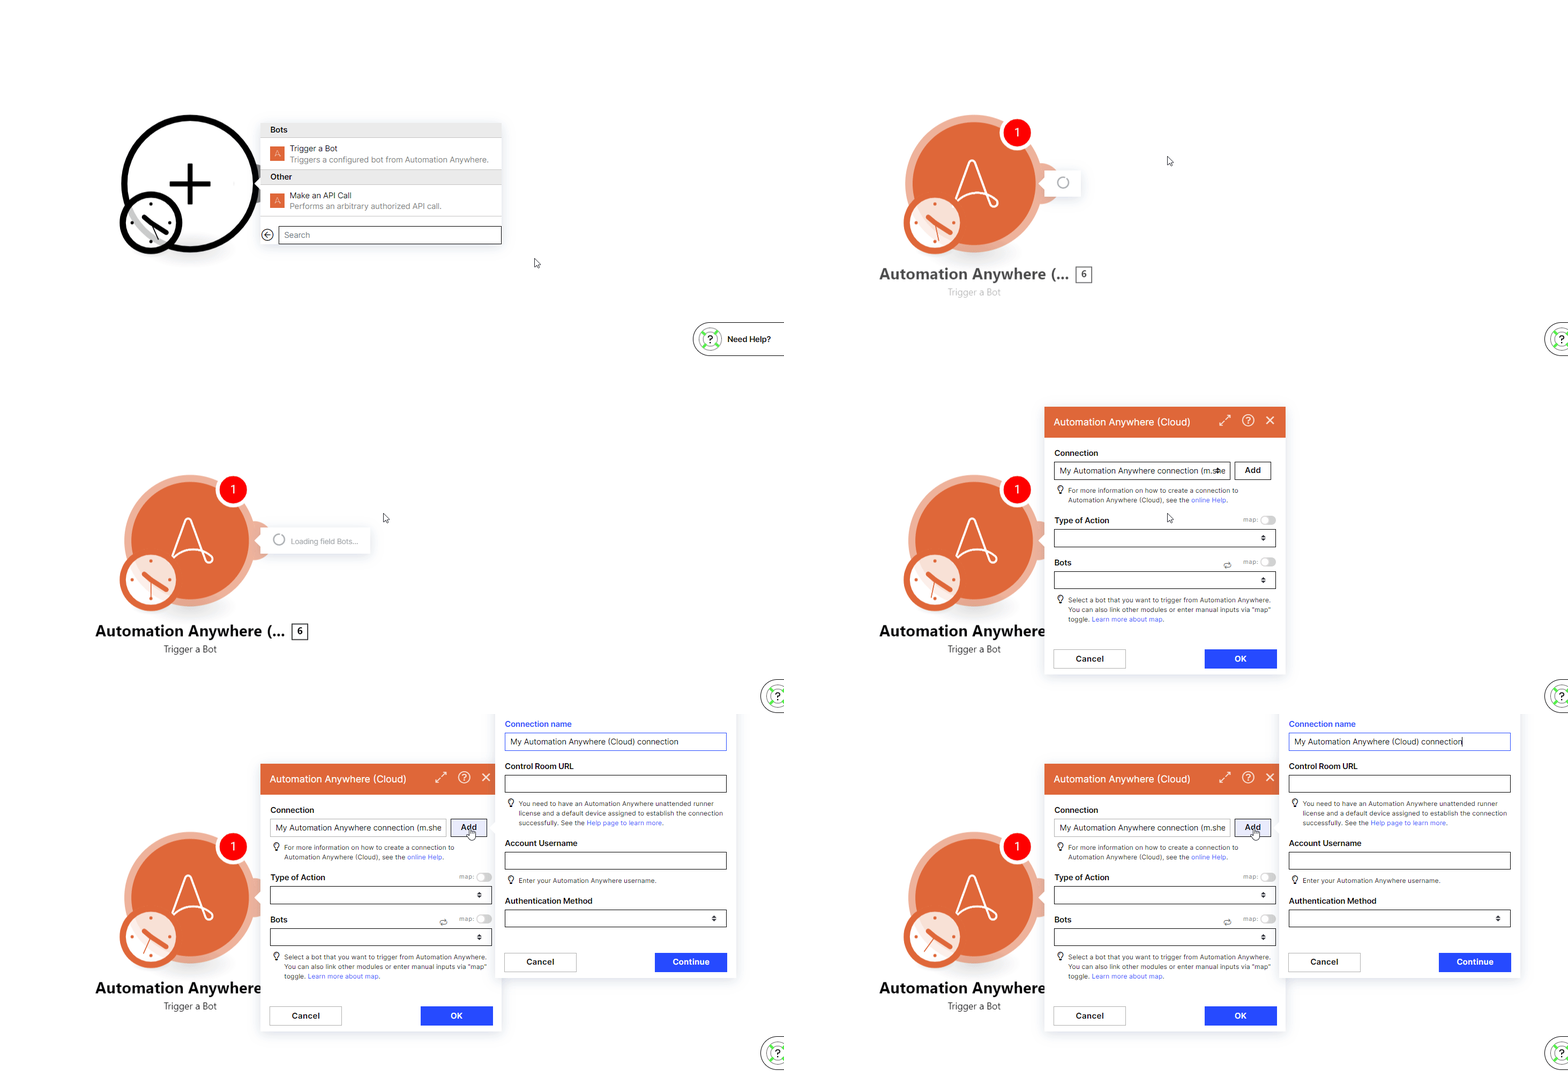
Log in to your Boost.space Integrator and add a moduleThe module is an application or tool within the Boost.space system. The entire system is built on this concept of modularity. (module - Contacts) More from the Automation Anywhere (Cloud) app into a Boost.space Integrator scenarioA specific connection between applications in which data can be transferred. Two types of scenarios: active/inactive. More .
-
Click Add next to the Connection field.
-
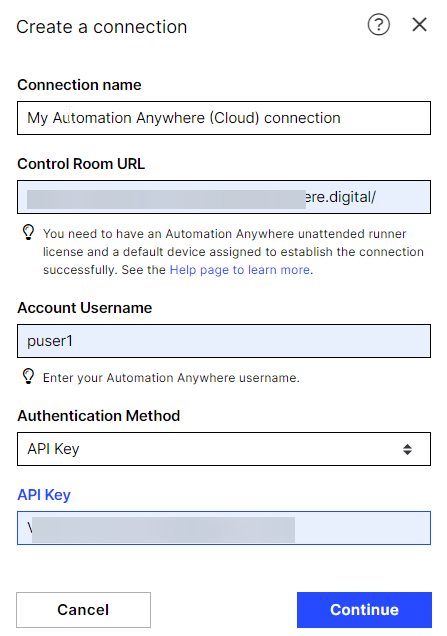
In the Connection name field, enter a name for the connection.
-
In the Control Room URL field, enter your control room URL address in the
http://<domain>.my.automationanywhere.digitalformat. This is a URL address used to access your Automation Anywhere application. -
In the Username field, enter your account’s username field.
-
You can authenticate the Automation Anywhere account either by using API key or your account password. In the Authentication Method field, select the option and enter the value to authenticate the account.
-
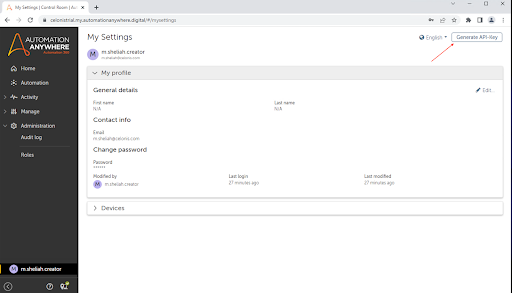
In the API Key field, enter the API key generated in your account. Using API keys is a way to authenticate an application accessing the API, without referencing an actual user (for example, in the organizations that support SSO). The app adds the key to each API request, and the API can use the key to identify the application and authorize the request. UsersCan use the system on a limited basis based on the rights assigned by the admin. More can generate an API key in the AA control room. See how to generate the API key.
-
In the Password field, enter your account’s password.
-
-
Click Continue.
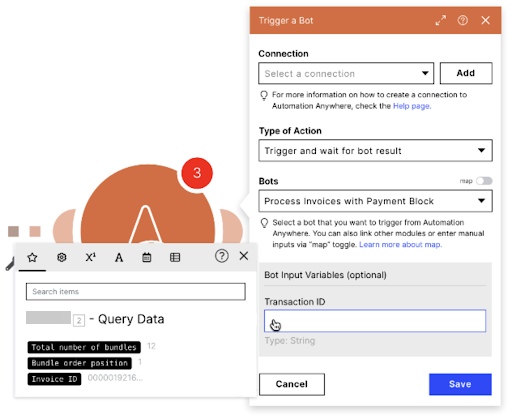
TriggersEvery scenario has a trigger, an event that starts your scenario. A scenario must have a trigger. There can only be one trigger for each scenario. When you create a new scenario, the first module you choose is your trigger for that scenario. Create a trigger by clicking on the empty module of a newly created scenario or moving the... a configured bot from Automation Anywhere.
This module allows you to trigger the bot that was configured in your Automation Anywhere Control Room and execute it on the user’s default device. Only unattended automation is possible at this point.
Prerequisites to deploy or trigger a bot:
-
View and Run my bots feature permissions
-
Run and schedule permissions for the folder that contains bots
-
Access to Bot Runner licensed users
-
Access to either a default device or a device pool
|
Connection |
Establish a connection to your Automation Anywhere (Cloud) account. |
|
Type of Action |
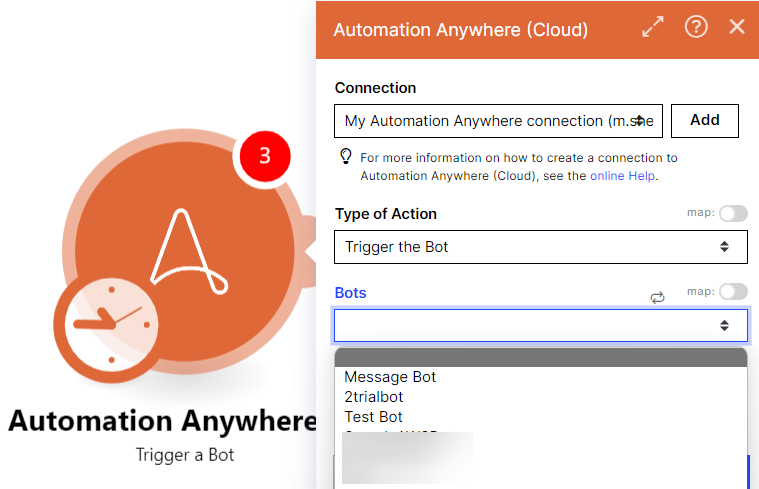
Select the action type for the bot:
|
|
Bot |
Select or map the bot (created and pre-configured in Automation Anywhere) you want to trigger and enter the details in the fields that auto-populate based on the selected bot. Map functionFunctions you can use in Boost.space Integrator - create, update, delete, get, search. allows a user to map a value from one of the previous modules instead of selecting a Bot from the dropdown list. For example, to dynamically define which bot has to be triggered based on the conditions fulfilled or not in the previous apps of the flow. If there are any input variables configured for the bot in your Automation Anywhere account, they would be shown in the app when you select the bot. Users can either enter the data manually or use the output values from the previous apps. |
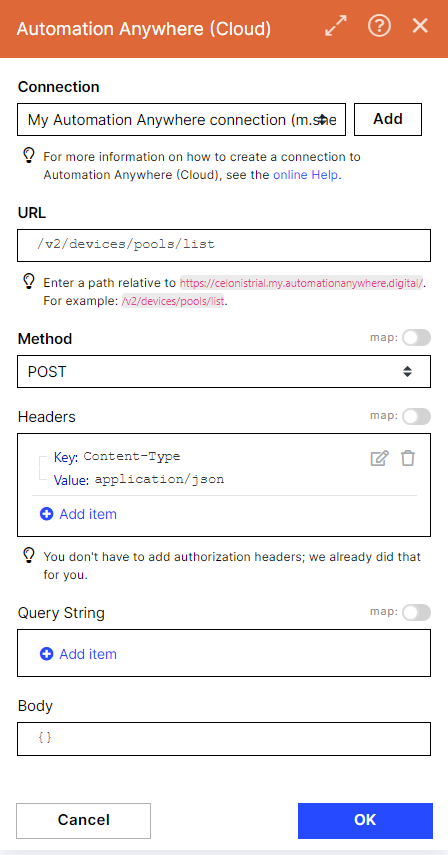
You can make API calls using the following module.
Performs an arbitrary authorized API call.
|
Connection |
|
|
URL |
Enter a path relative to |
|
Method |
Select the HTTP method you want to use: GET to retrieve information for an entry. POST to create a new entry. PUT to update/replace an existing entry. PATCH to make a partial entry update. DELETE to delete an entry. |
|
Headers |
Enter the desired request headers. You don’t have to add authorization headers; we already did that for you. |
|
Query String |
Enter the request query string. |
|
Body |
Enter the request query string. |
The following API call returns the device pools from your Automation Anywhere (Cloud) account:
URL
/v2/devices/pools/list
Method
POST
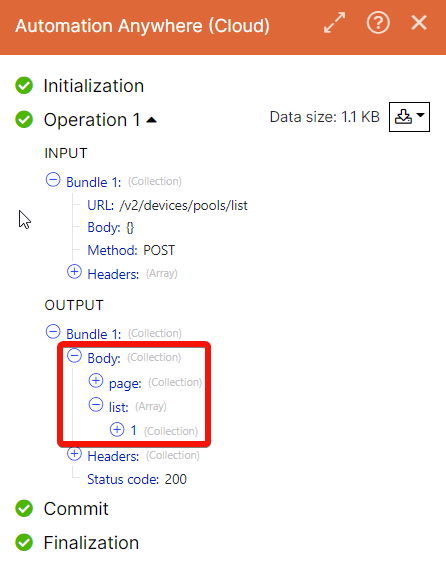
Matches of the search can be found in the module’s Output under BundleA bundle is a chunk of data and the basic unit for use with modules. A bundle consists of items, similar to how a bag may contain separate, individual items. More > Body > list.
In our example, 1 device pool is returned:

![[Important]](https://docs.boost.space/wp-content/themes/bsdocs/docs-parser/HTML/css/image/important.png)
