| Active with remarks |
|---|
| This application needs additional settings. Please follow the documentation below to create your own connectionUnique, active service acces point to a network. There are different types of connections (API key, Oauth…). More. |
(source: https://gethelp.wildapricot.com/en/articles/1653)
Every organization is different, with different requirements and workflows. For example, one organization might need daily synchronization with QuickBooks Online, and another might want to automatically copy new events to their Facebook page.
Wild Apricot cannot anticipate and implement every possible scenarioA specific connection between applications in which data can be transferred. Two types of scenarios: active/inactive. More, but we can provide the tools that allow you to build your own automated workflows. Using them, you can automate repetitive manual processes involving Wild Apricot and other software.
To provide these tools, we have added a Wild Apricot moduleThe module is an application or tool within the Boost.space system. The entire system is built on this concept of modularity. (module - Contacts) More to Boost.spaceCentralization and synchronization platform, where you can organize and manage your data. More IntegratorPart of the Boost.space system, where you can create your connections and automate your processes. More, an integration and automation platform. Within our Boost.space Integrator module, we provide templatesTemplates are predefined scenarios that you can expand and customize to create new scenarios. You can then share these with friends and colleagues. More that you can use to build and run your own automated integration scenariosA specific connection between applications in which data can be transferred. Two types of scenarios: active/inactive. More.

Using Boost.space Integrator‘s drag-and-drop interface, clients (and partners) can harness the power of Wild Apricot’s API without having to understand or write code.
Other examples:
For more ideas of what you can do with Boost.space Integrator, see this blog post.
The following steps are involved in using Wild Apricot modulesThe module is an application or tool within the Boost.space system. The entire system is built on this concept of modularity. (module - Contacts) More in Boost.space Integrator.
-
Set up an Boost.space Integrator account.
-
Authorize Boost.space Integrator as an external application in Wild Apricot.
-
Begin customizing and running scenarios.
These steps are described in detail below.
To set up an Boost.space Integrator account, go to make.com and click the Sign up button. You can sign up for free or choose any of the paid plansCombination of a license (enabled features) and tier (numeric limits) and a subscription period (monthly / yearly).. The Free planCombination of a license (enabled features) and tier (numeric limits) and a subscription period (monthly / yearly). allows you up to 1,000 operationsAn operation is a task performed by module. More a month. The Basic plan ($9 USD/month) allows a maximum of 10,000 operations per month.
For more information on Boost.space Integrator plans, click here.
To authorize Boost.space Integrator as an external application within Wild Apricot, follow these steps:
-
Hover over the Settings menu and select the Integration option. Within the integration settings, select the Authorized applications option.

-
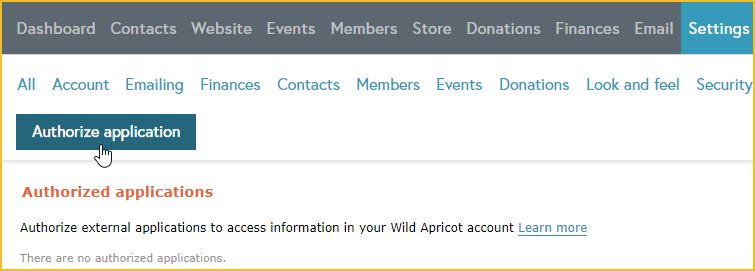
On the Authorized applications screen, click the Authorize application button.
-
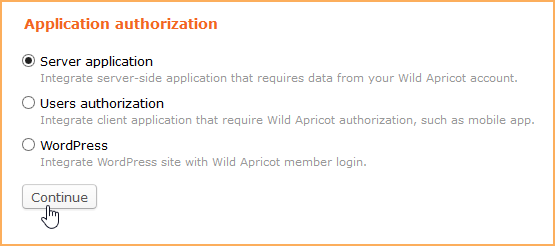
Choose the Server application option then click Continue.
-
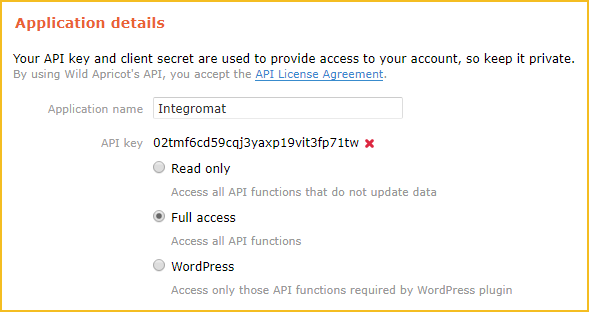
Enter Boost.space Integrator as the application name.
-
Copy the API key and save it somewhere. You’ll be needing it when you start using Boost.space Integrator.
-
Click the Full access option.
-
Click the Save button.
Now that you have an Boost.space Integrator account and a Wild Apricot API key, you can start customizing and running the templates we’ve set up in Boost.space Integrator. These templates perform commonly requested processes, such as sending members messages on their birthdays. You can customize these templates or run them as is.
To run or customize a Wild Apricot templateTemplates are predefined scenarios that you can expand and customize to create new scenarios. You can then share these with friends and colleagues. More in Boost.space Integrator, follow these steps:
-
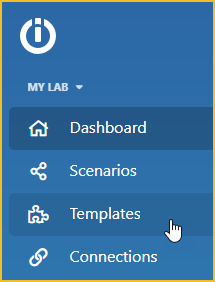
Click Templates within your Boost.space Integrator menu.
-
Click the Filter icon.
-
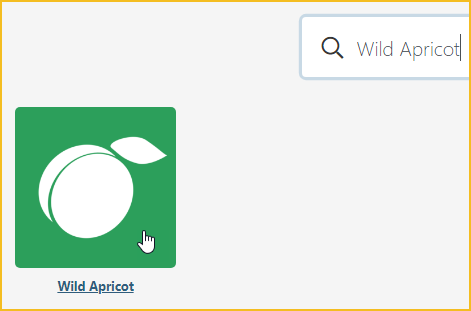
Search for Wild Apricot then click the Wild Apricot icon.
-
Select the Wild Apricot template you want to use.
-
Click Create new scenario from template.
-
Choose the name of your organization (if not already selected) then click Continue.
-
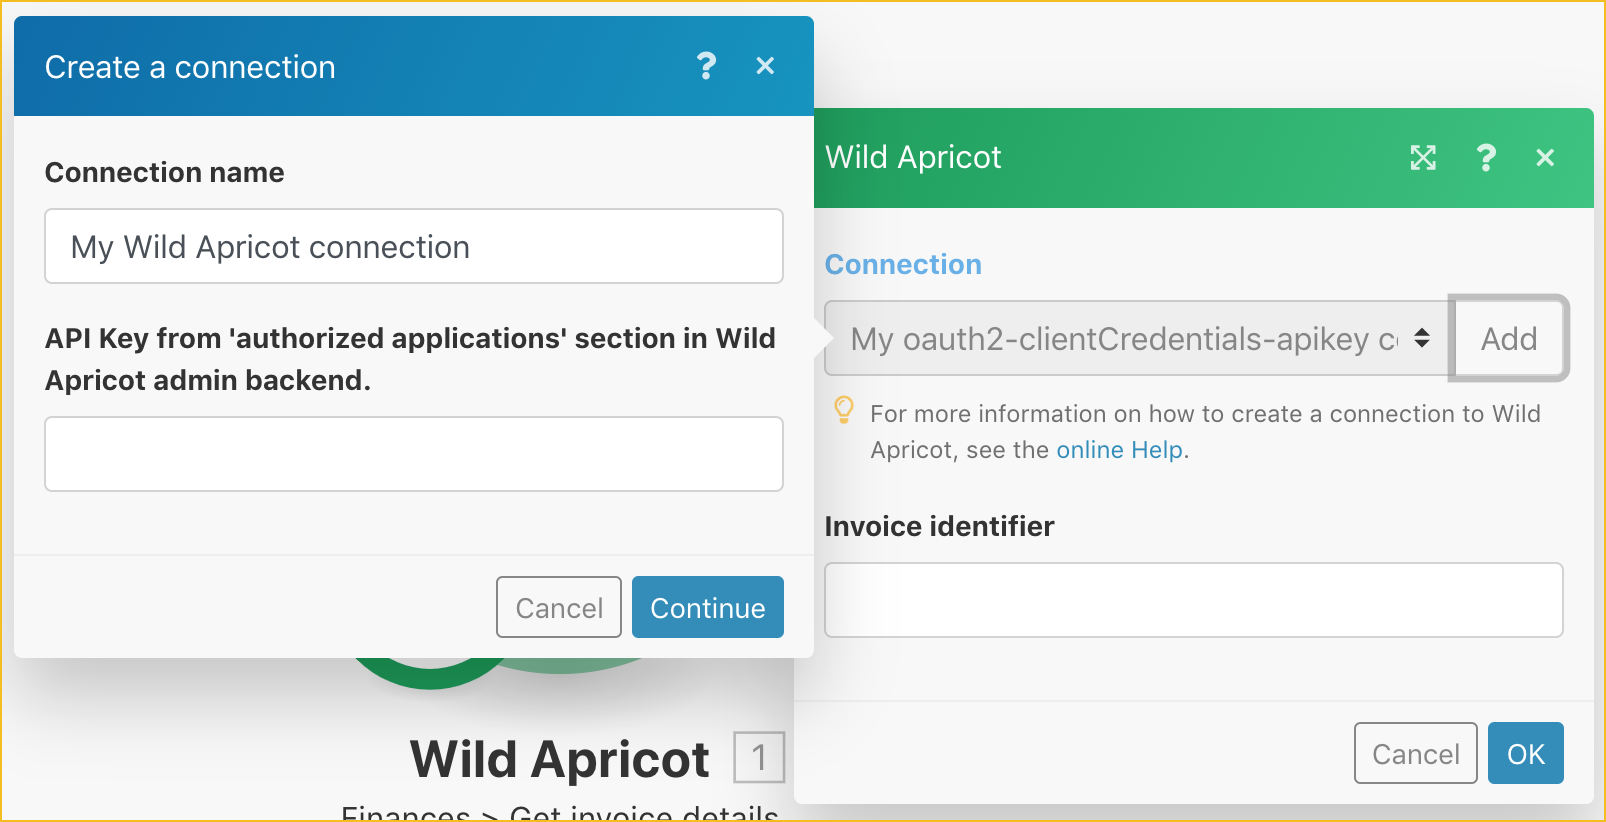
Click Add beside the Connection field, and paste the Wild Apricot API key you copied when you authorized Boost.space Integrator as an external application in Wild Apricot.
-
Depending on the template, you may be required to provide additional parameters. After you’ve completed all the required fields, Boost.space Integrator will create a scenario from the template and the information you provided. You can then modify the scenario as needed.
Allows you to perform a custom API call.
|
Connection |
Establish a connection to your Wild Apricot account. |
|||
|
URL |
Enter a path relative to
|
|||
|
Method |
Select the HTTP method you want to use: GET to retrieve information for an entry. POST to create a new entry. PUT to update/replace an existing entry. PATCH to make a partial entry update. DELETE to delete an entry. |
|||
|
Headers |
Enter the desired request headers. You don’t have to add authorization headers; we already did that for you. |
|||
|
Query String |
Enter the request query string. |
|||
|
Body |
Enter the body content for your API call. |
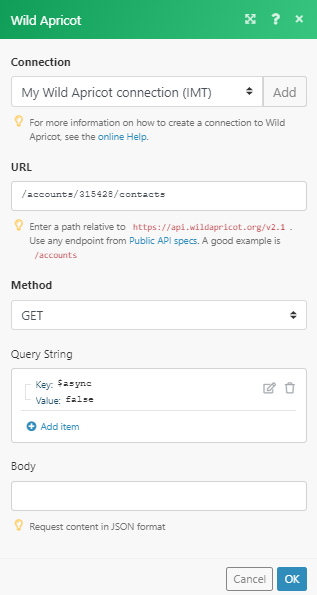
The following API call returns contacts in your Dropbox account:
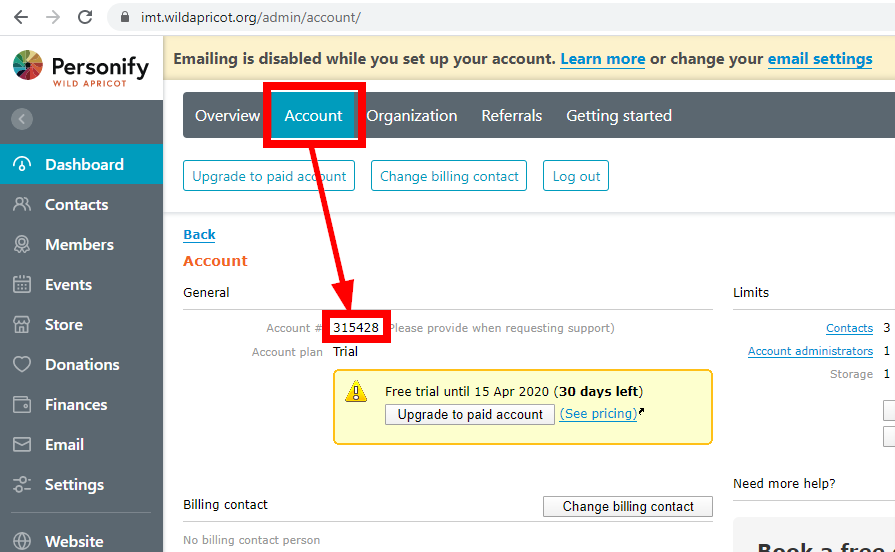
URL: /accounts/315428/contacts
The Account ID can be found under Account settings:
Method: GET
Query String:
Key: $async Value: false
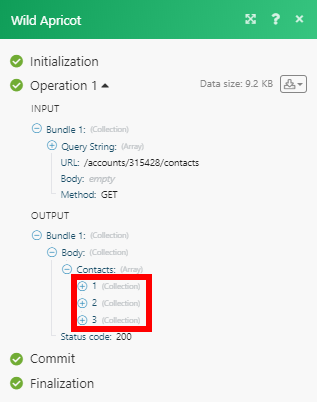
The results can be found in the module’s Output under BundleA bundle is a chunk of data and the basic unit for use with modules. A bundle consists of items, similar to how a bag may contain separate, individual items. More > Body > Contacts. In our example, 3 contacts were returned:

![[Note]](https://docs.boost.space/wp-content/themes/bsdocs/docs-parser/HTML/css/image/note.png)