| Active with remarks |
|---|
| This application needs additional settings. Please follow the documentation below to create your own connectionUnique, active service acces point to a network. There are different types of connections (API key, Oauth…). More. |
The EasyCSV modulesThe module is an application or tool within the Boost.space system. The entire system is built on this concept of modularity. (module - Contacts) More allow you to watch data imports and upload data to a CSV file in your EasyCSV account.
Prerequisites
-
An EasyCSV account
In order to use EasyCSV with Boost.spaceCentralization and synchronization platform, where you can organize and manage your data. More IntegratorPart of the Boost.space system, where you can create your connections and automate your processes. More, it is necessary to have an EasyCSV account. If you do not have one, you can create an EasyCSV account at easycsv.io/signup.
![[Note]](https://docs.boost.space/wp-content/themes/bsdocs/docs-parser/HTML/css/image/note.png) |
Note |
|---|---|
|
The moduleThe module is an application or tool within the Boost.space system. The entire system is built on this concept of modularity. (module - Contacts) More dialog fields that are displayed in bold (in the Boost.space Integrator scenarioA specific connection between applications in which data can be transferred. Two types of scenarios: active/inactive. More, not in this documentation article) are mandatory! |
To connect your EasyCSV account to Boost.space Integrator you need to obtain the EasyCSV WebhookA webhook is a way for an app to send real-time information to a specific URL in response to certain events or triggers. URL and API Key from your EasyCSV account and insert it in the Create a connection dialog in the Boost.space Integrator module.
-
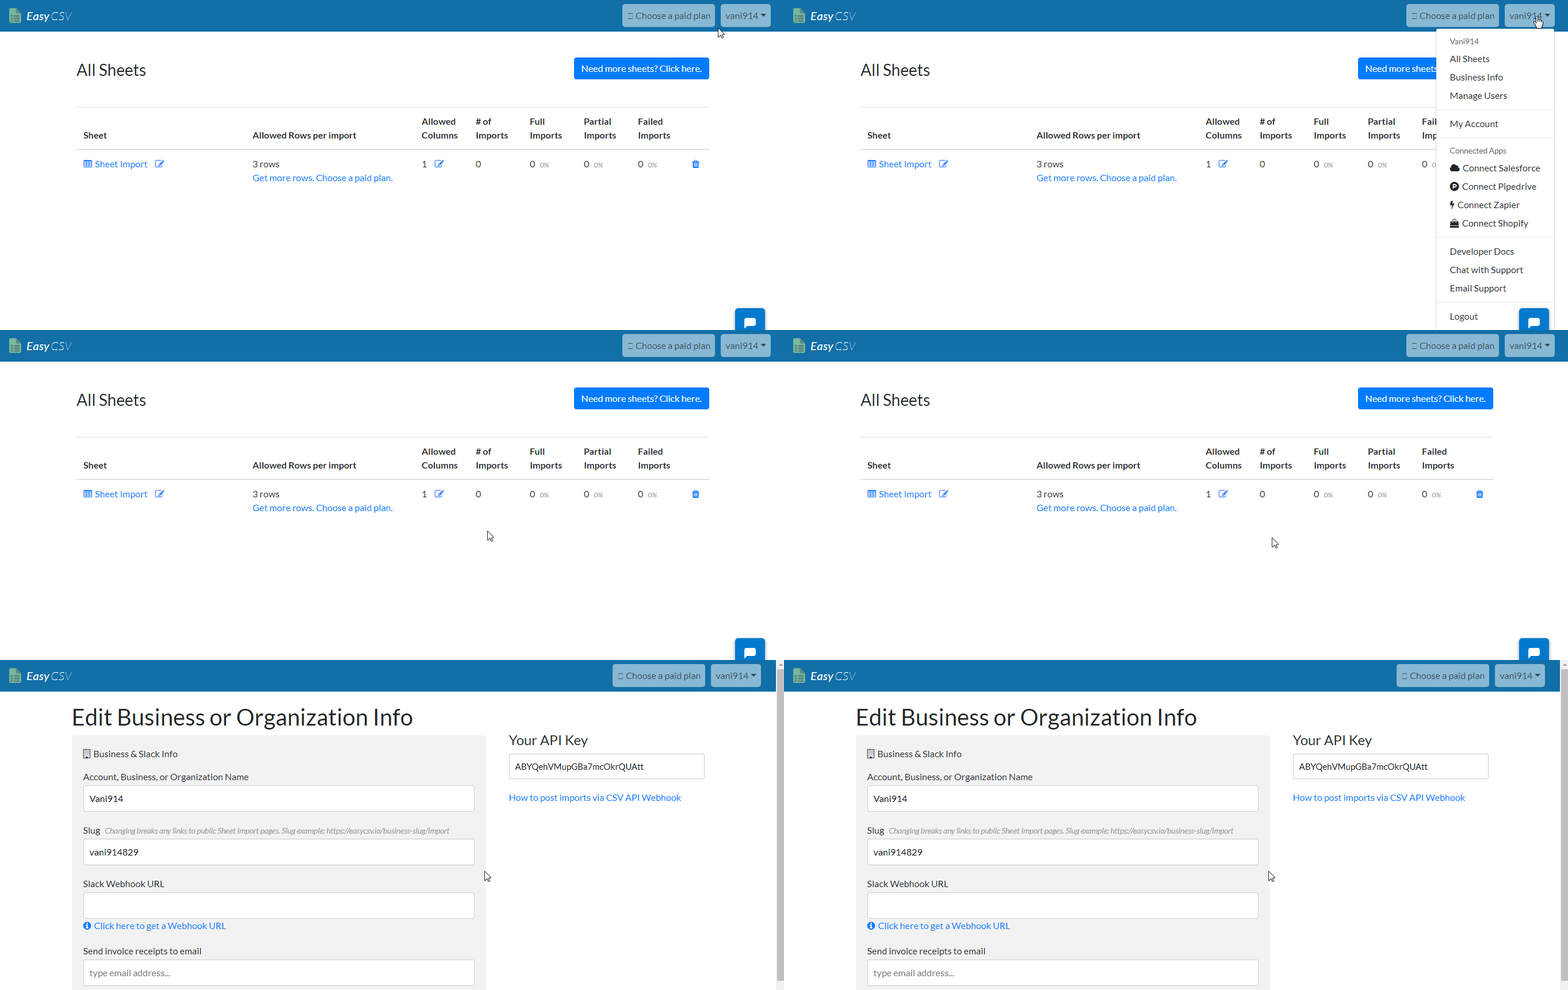
Log in to your EasyCSV account.
-
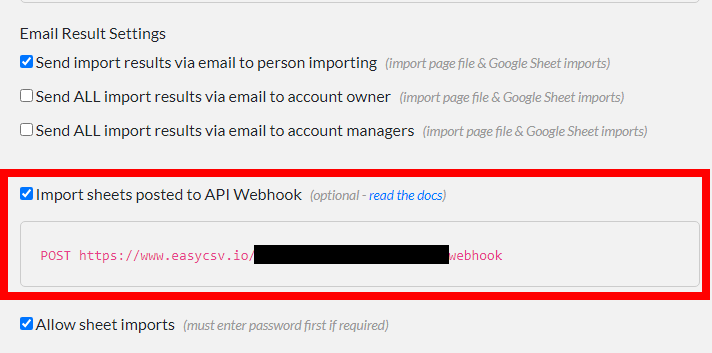
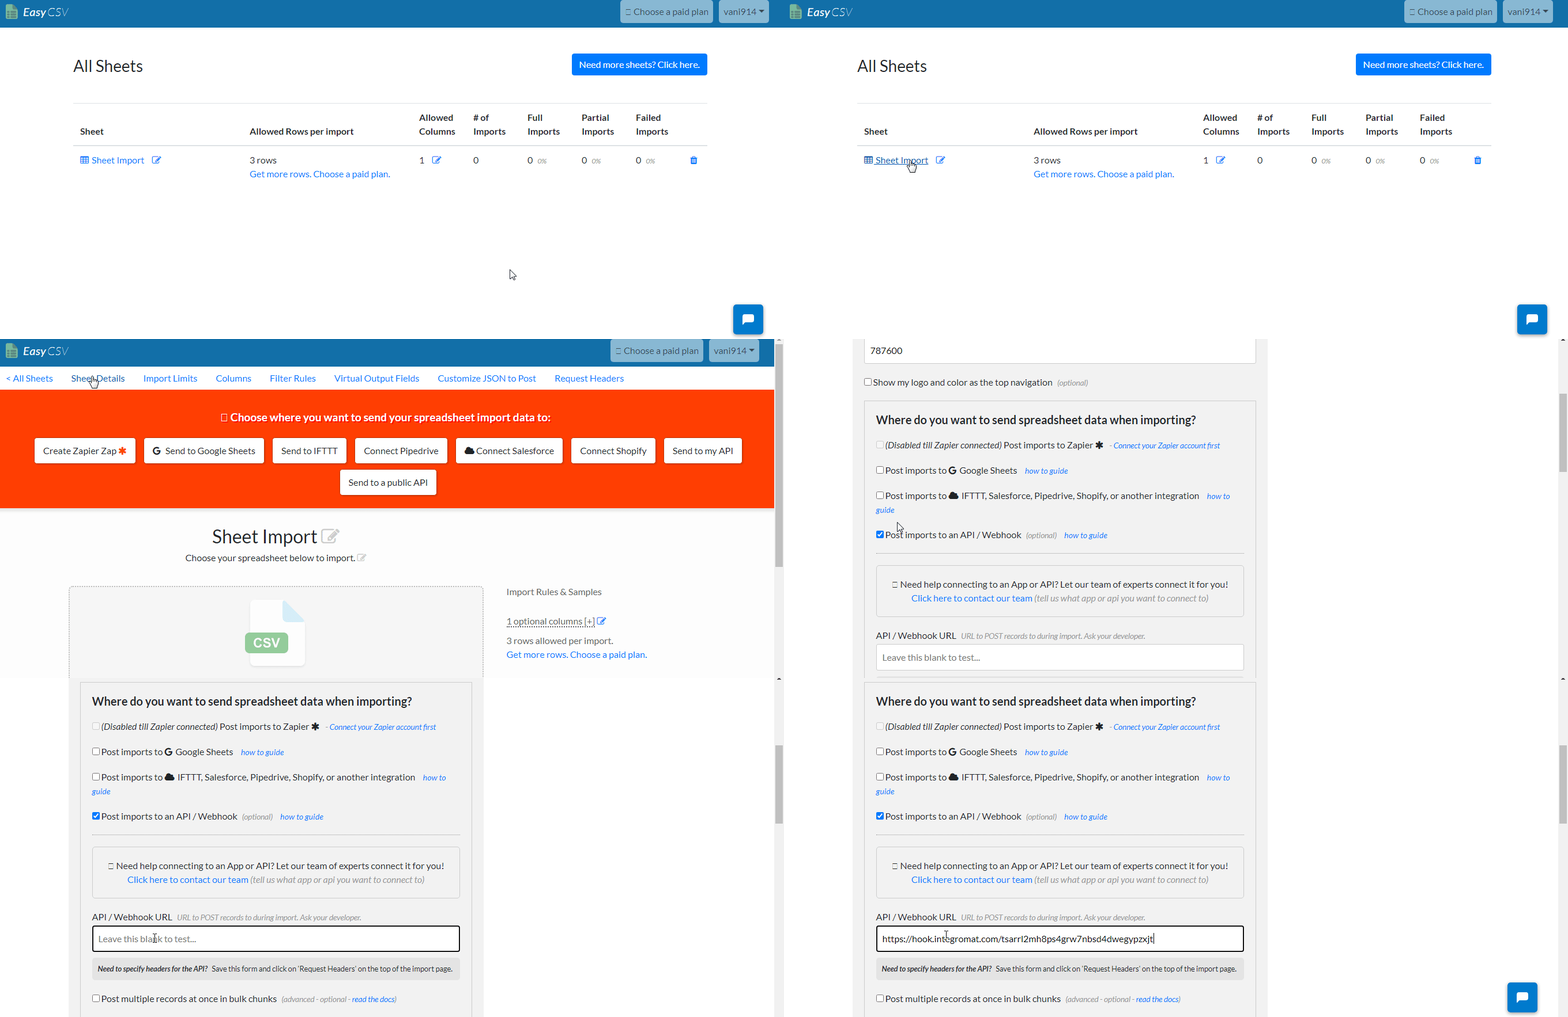
Click Sheets > Import Sheet Details. Enter the sheet details and click Save. Copy the Import Sheet posted to API Webhook URL address.
-
Open any board, click Your Username > Business Info.
-
Copy the API Key to your clipboard.
-
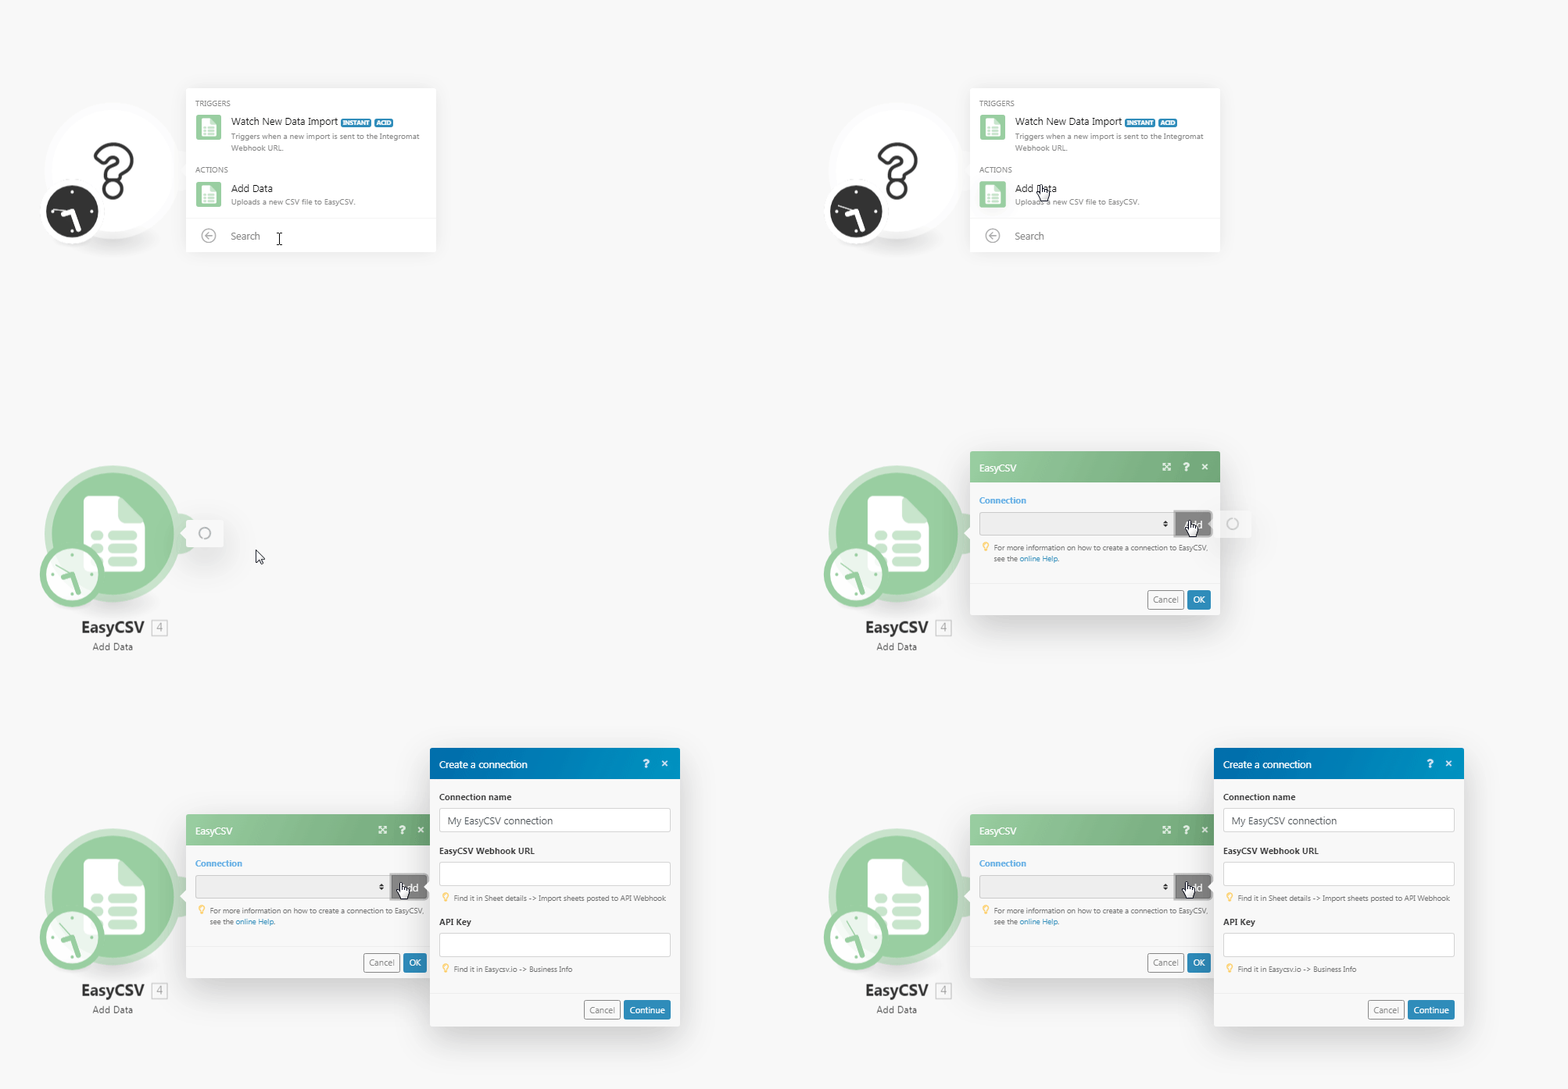
Go to Boost.space Integrator and open the EasyCSV module’s Create a connection dialog.
-
In the Connection name field, enter a name for the connection.
-
In the EasyCSV Webhook URL field, enter the URL address copied in step 2.
-
In the API Key field, enter the API key copied in step 4. Click Continue.
The connection has been established.
TriggersEvery scenario has a trigger, an event that starts your scenario. A scenario must have a trigger. There can only be one trigger for each scenario. When you create a new scenario, the first module you choose is your trigger for that scenario. Create a trigger by clicking on the empty module of a newly created scenario or moving the... when a new import is sent to the Boost.space Integrator Webhook URL.
|
Webhook Name |
Enter a name for the webhook. |
|
Connection |
-
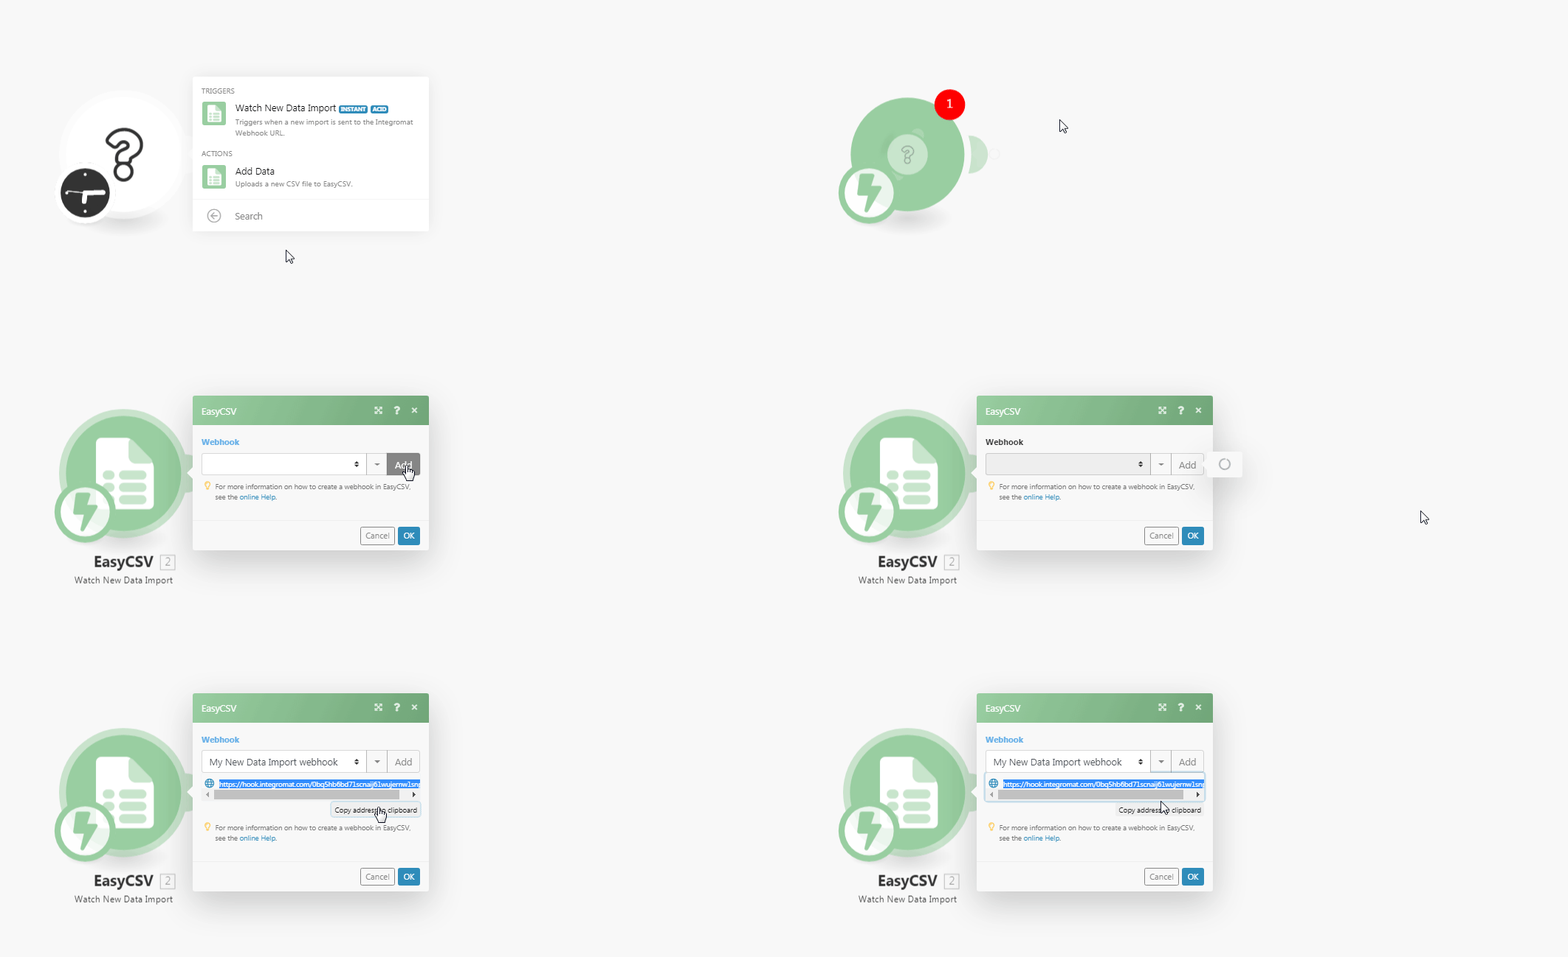
Open the Webhook module, enter a name for the webhook, establish a connection, and click Save. Copy the address to your clipboard.
-
Login to your EasyCSV account, open the sheet to which you want to watch the data import, select Post imports to API/Webhook, and in the API/Webhook URL field, enter the URL address copied in step 1. Click Save.
Uploads a new CSV file to EasyCSV.
|
Connection |
|
|
Public File URL |
Enter the publicly accessible URL address to the CSV file whose data you are uploading. |
|
Importer Email |
Enter the email address to send the import results. |
|
Import Name |
Enter a name for this import. If no name is specified, the file name is considered as import name. |

