How to Create a Custom Module and Configure It for Your System
In this article, you will learn how to create your custom moduleThe module is an application or tool within the Boost.space system. The entire system is built on this concept of modularity. (module - Contacts) More and how you can edit it.
Creating a custom module and its configuration
1. You can create your custom module directly on the system Homepage by a) clicking on the + icon and b) selecting “add module” under actions.
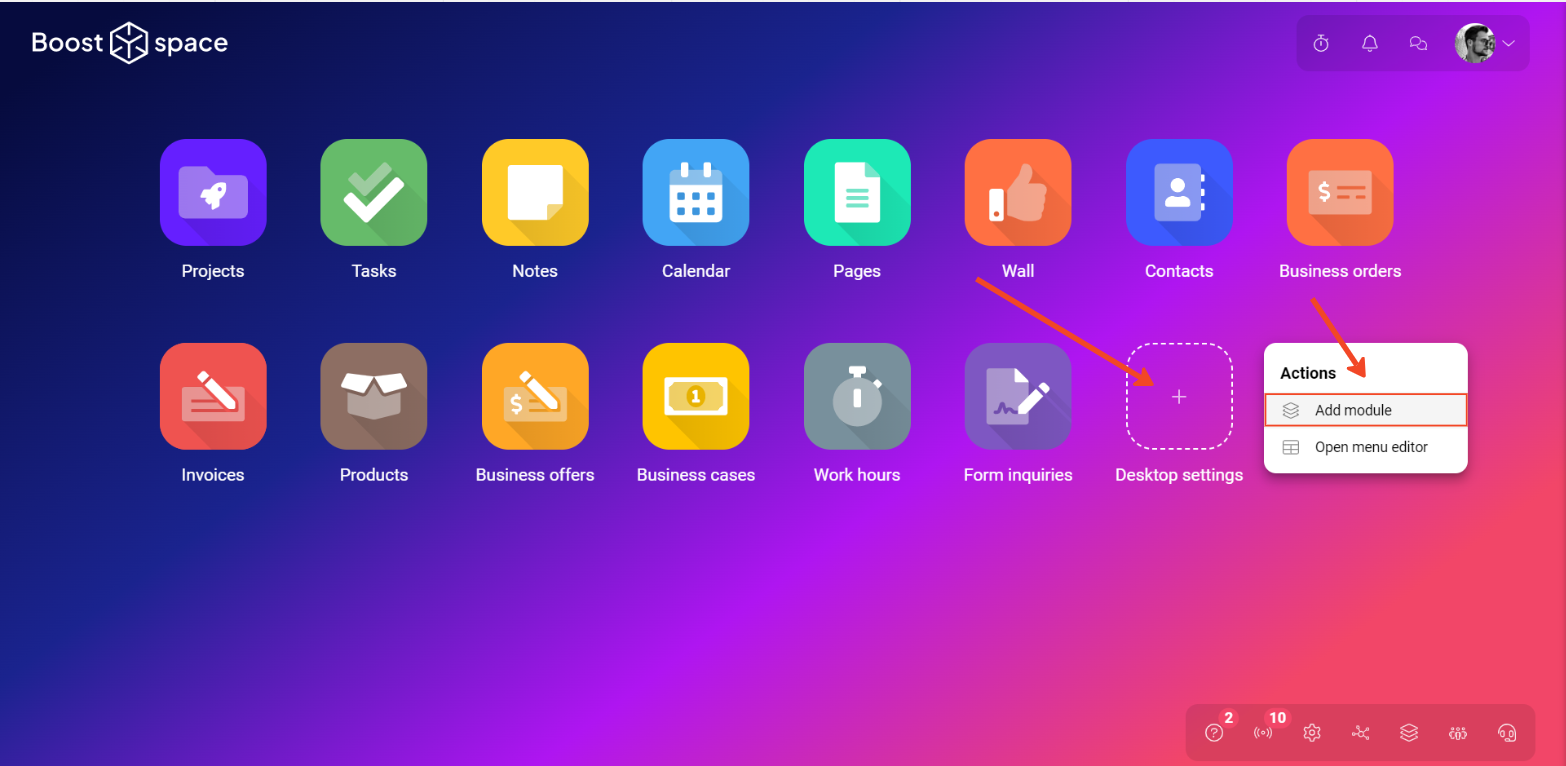
PS: You can also create a custom module in another way: Learn more about it in our modulesThe module is an application or tool within the Boost.space system. The entire system is built on this concept of modularity. (module - Contacts) More category.
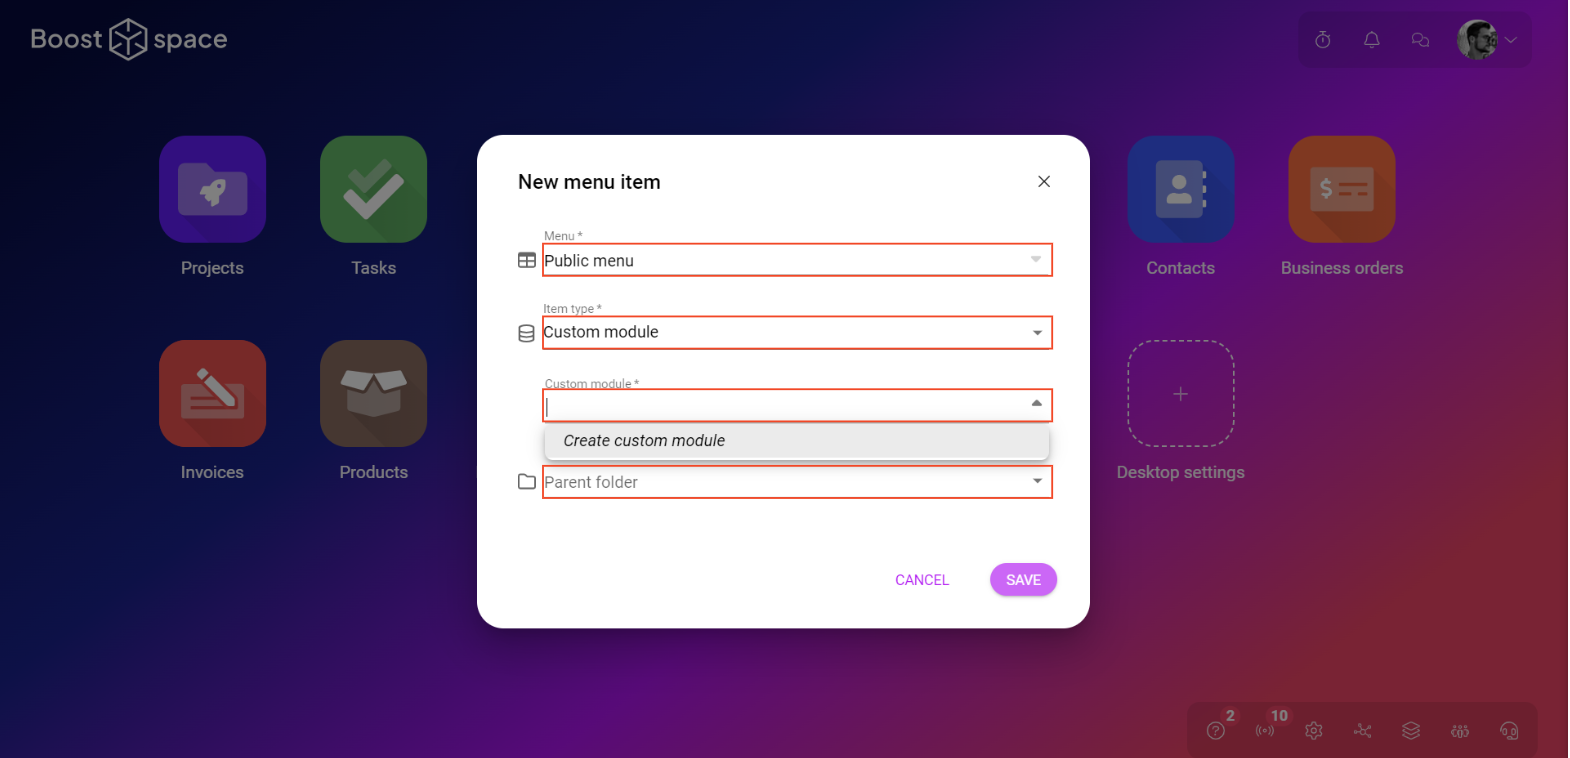
2. Here, select the menu you want to assign this module to, and from the “ItemItems are rows in records (order/request/invoice/purchase...) type” menu select Custom module and in the box below select “Create the custom module”. If you want you can assign a “parent folder” to the module.
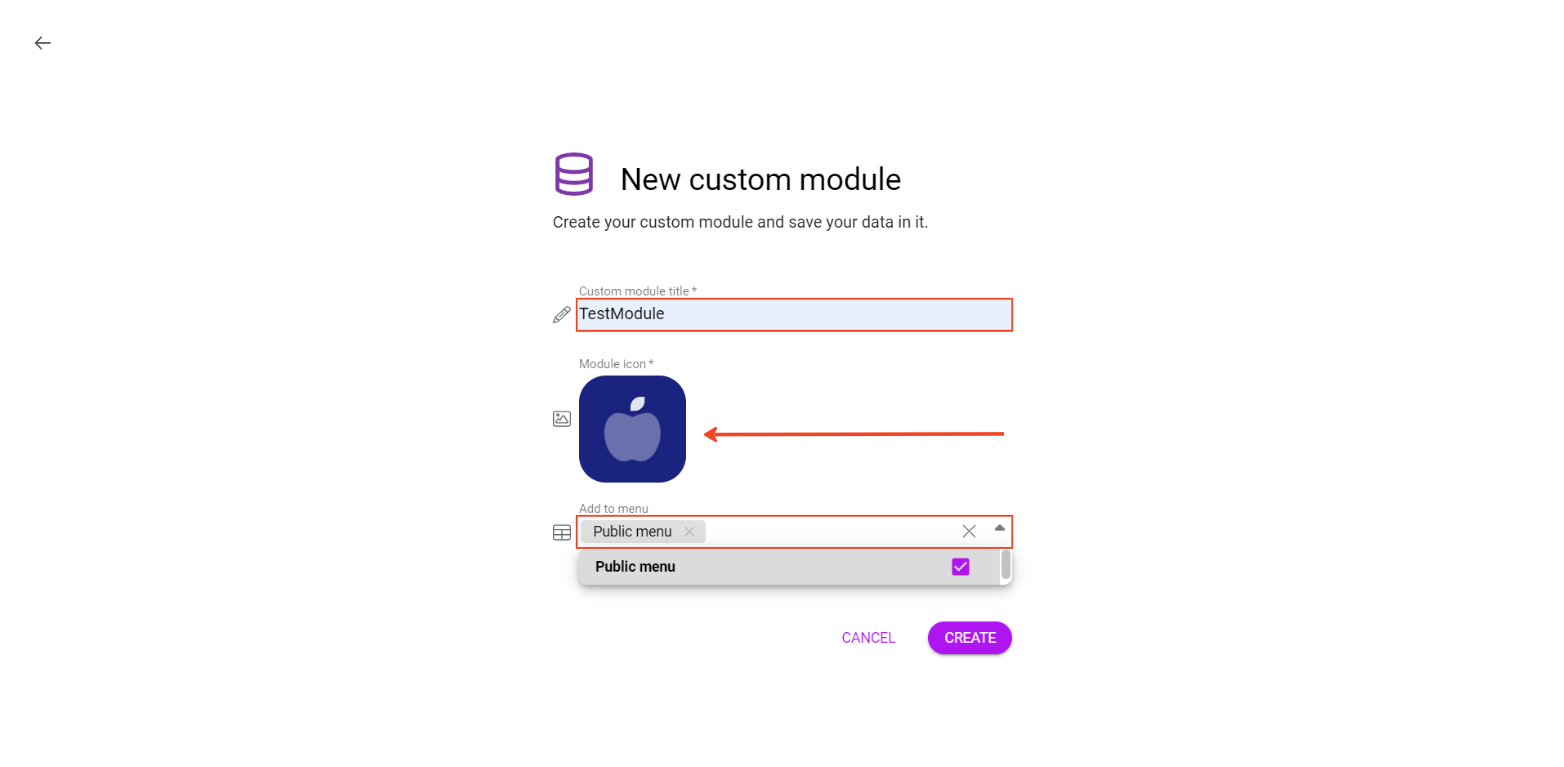
3. In this window choose the name of the module, select its icon and color, and assign the module to the appropriate menu.
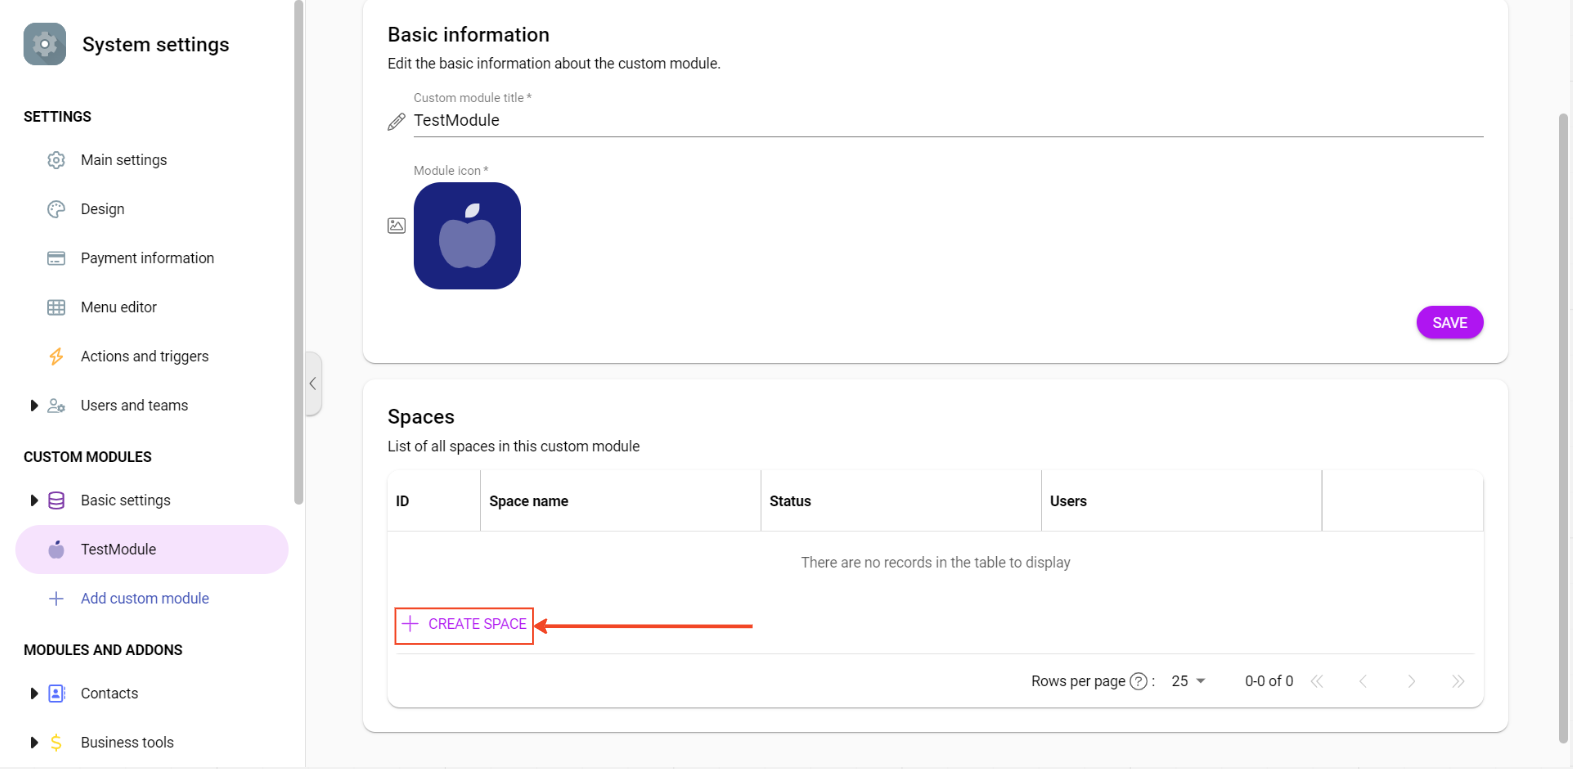
4. After creation you are in the system settingsMain settings of the Boost.space system that is accessible only by admins. You can change a variety of things here (custom fields, actions and triggers, design, etc.) – in the custom modules section. Here you can create a spaceSubunits are created within modules to maintain organization and clarity, even with large amounts of data. More – simply click on create a space.
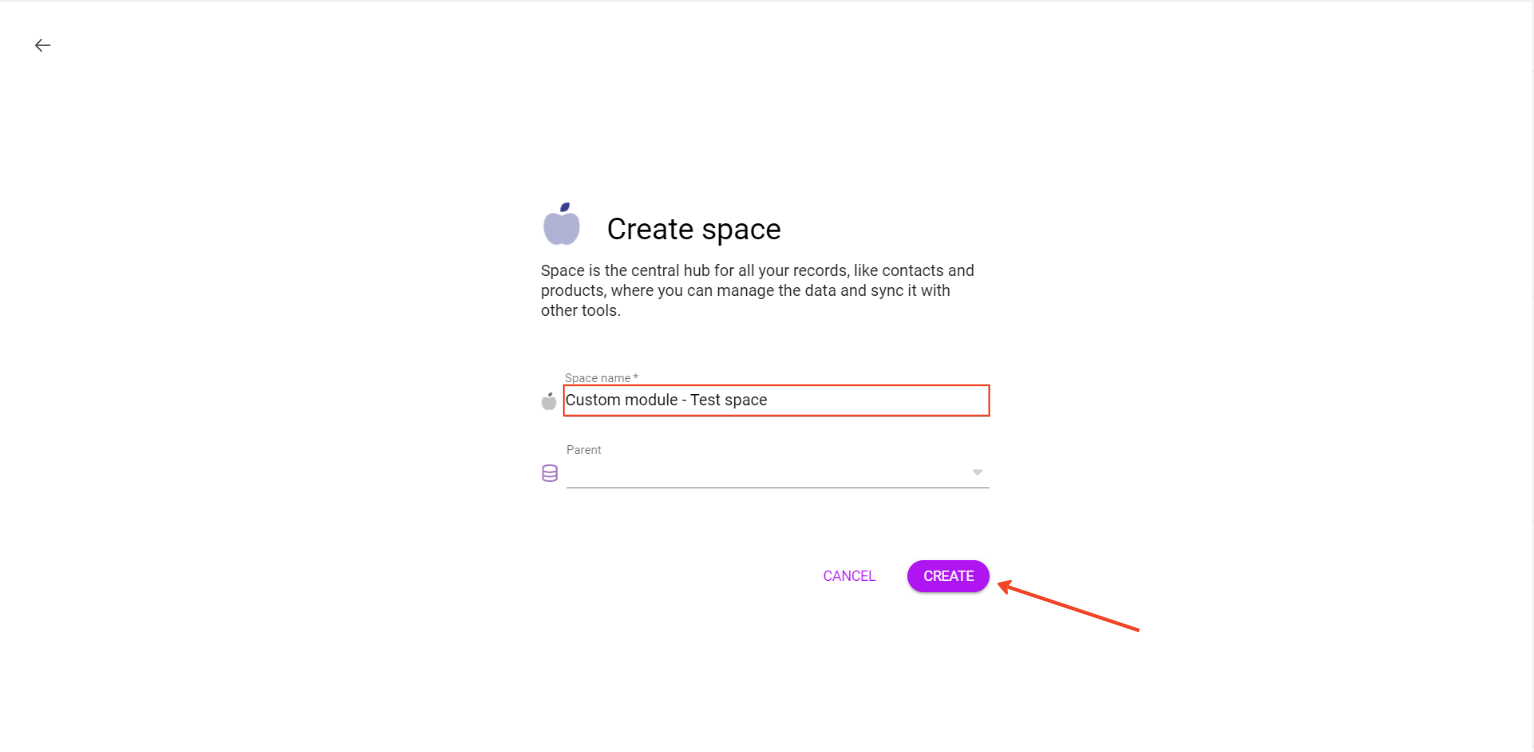
5. Name your space and click on “Create”.
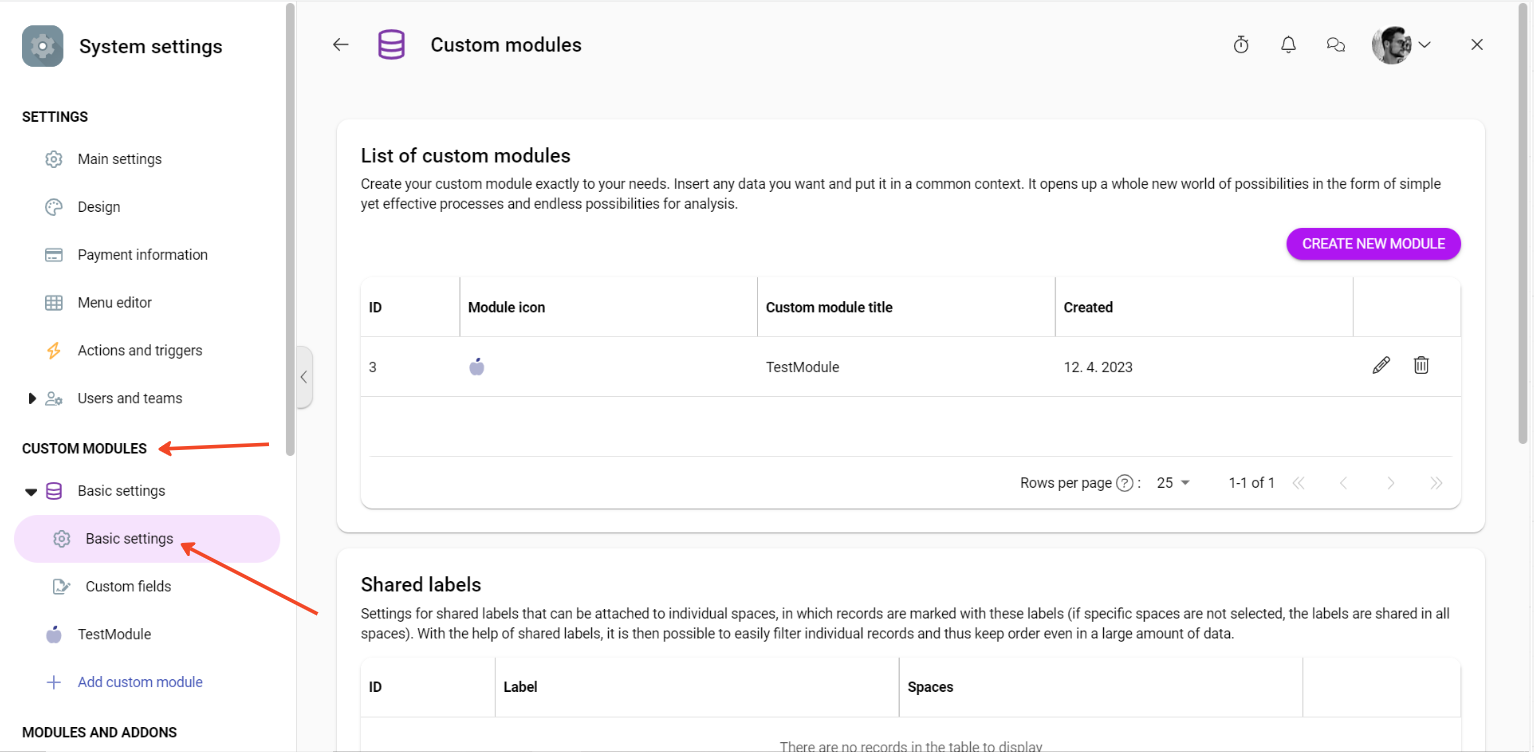
6. Now you can go to system settings and select the tab – Custom Modules – Basic settings.
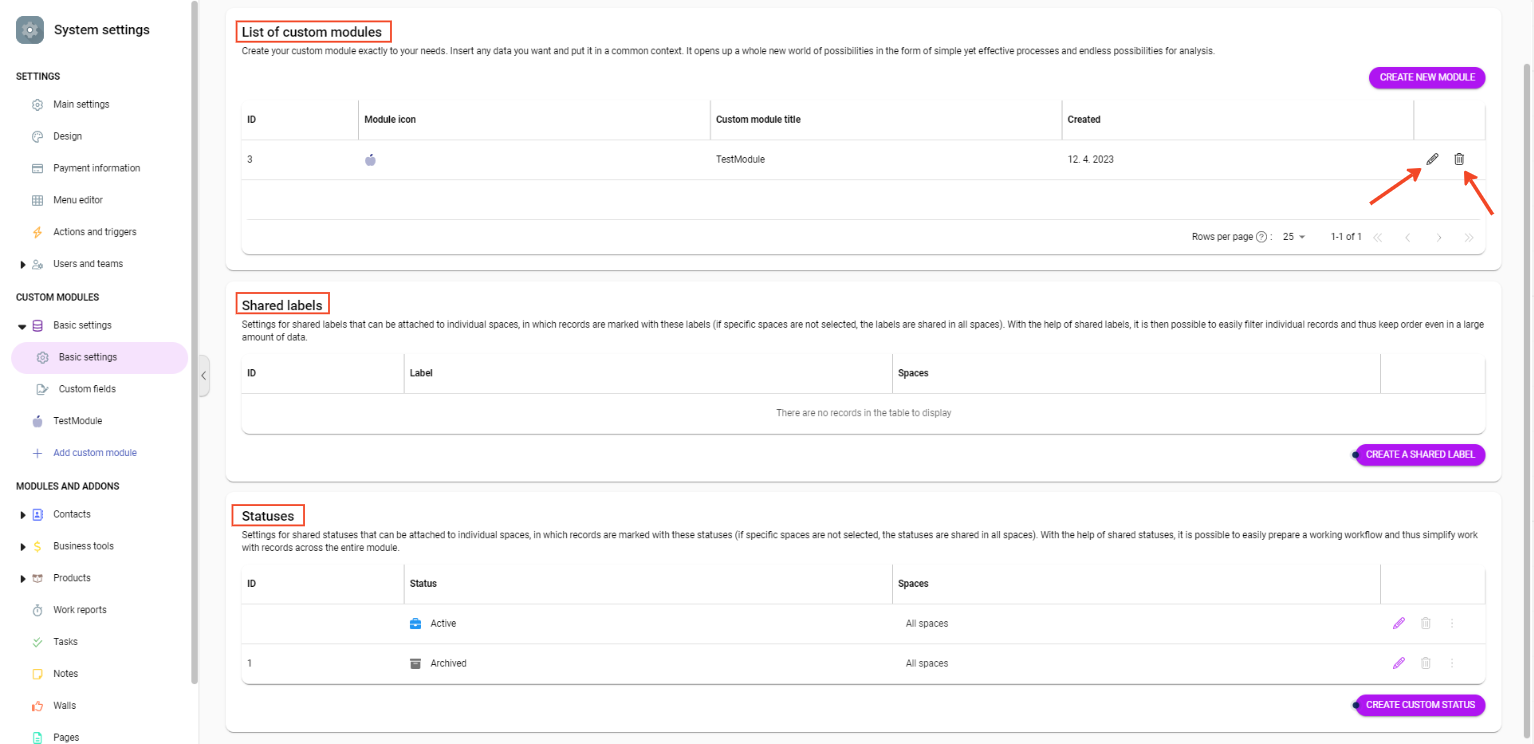
7. Here you can see your custom modules and you can create and add shared labelsA label is a “tag” that can be added to items within a module. It's a flexible tool used to categorize and organize data, making it easier to customize workflows and processes. More and statusesCreate statuses for each module separately to create an ideal environment for efficient and consistent work. More. You can also edit or delete your module in this section.
8. Congratulations! You have just created your Custom module, created a space in it, and learned the basic information. If you want to learn more about setting up modules – try the article on Custom FieldsA feature in Boost.space that allows you to define and manage data within each module according to your specific needs. More or Shared Labels and Statuses.
